Control Surface Practice Kit – Getting started

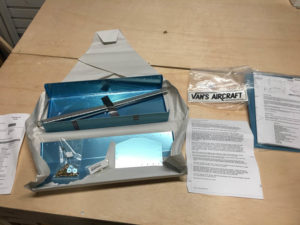
Since I can’t make any further progress on my toolbox, I decided to go ahead and open up the other Practice Kit.  This is more like what I was expecting!

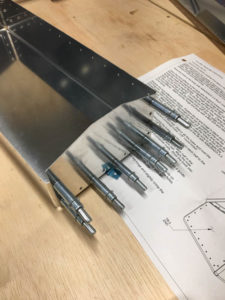
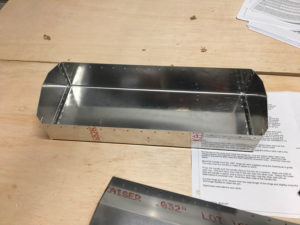
First instructions at to fabricate a stiffener using some longer pieces of stock.  EXCELLENT!  Had to sit and stare at the diagram for a bit to understand exactly what was being asked, but think I figured it out.  Some quick work on the band-saw as well as the Scotch Bright wheel and we are all set.  Only issue is that I think Vans has a small error in the diagram.  They put the wrong label on the “R” and “L” pieces showing how to fabricate.  If you label the parts that way, they don’t match the exploded part diagram and layout image.  Easy enough to fix as I don’t see how putting them in “backwards” would cause any issues.  I just relabeled my parts.

I’m ready to do some match drilling but going to hold off for a bit.  Already had lots of fun, and don’t want to finish my new project in one day!

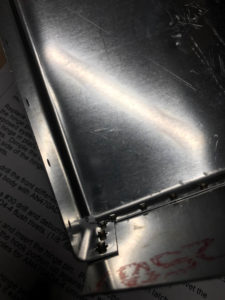
Also, I want to wait for my sub-structure dimple die from Cleveland-Tool to arrive to see how well they work.

All for now.

Mistakes have already been made!

Just when you think you totally understand what needs to be done, take a second look.

The directions for how to attach the hinge to the toolbox didn’t fully make sense to me, but I “thought” I understand what was being asked.  OOPS!, I was mistaken, and the holes I drilled were far too close to the edge of the hinge material.  (The hinge attaches to the OUTSIDE of the toolbox!).  Also when they say that the eyelets should be flush with the top of the box, they mean that the top of the eyelets should be flush, not the bottom.  Oh well.

So this means that I will be putting the build of my tool-box on hold until I can order a new hinge.  Not the worst thing in the world, but slightly annoying.  The debate is, order the part now, or wait until I order the Empennage just in case my next practice kit also needs some replacement parts!

I’ll see if I can do any additional steps, or if I just need to wait until the new hinge arrives.  Bummer.  I was just starting to have fun putting this together!

Starting the toolbox

So the toolbox kit arrived yesterday, so decided to just jump in.

Instructions are pretty simplistic.  Basically just a single sheet that basically says “put the pieces together and build it!”  Not sure what I was expecting, but this is a pretty simplistic project and may have to purchase two more kits for both of my little girls.

Got started basically the first few steps.  Assemble and connect the ends of the toolbox.  Deburred the edges of the pieces, Clecoed and match drilled all the holes, then deburr all the drilled holes.  Pretty straightforward.

Next Dimple the frame and the ends.  Got to use my DRDT-2 as well as my squeezer, then re-assemble and start to rivet using the flush rivets.  Again, was able to use the Squeezer on the first few rivets on each side.  Slightly oversqueezed the first few, but then got the Squeezer dialed in.  I may try to drill out those rivets to practice that repair, and to make it look a little better.  For the remainder, I had to use my rivet gun and bucking bar.  Somehow I think it may take me a little while to really get the hang of it.  I don’t think my rivets are terrible, but I know they aren’t perfect.

At this point both sides are on, and I’ll start working on the lid shortly.


Training Kit and Toolbox ordered

So I finally submitted my first order to Vans Aircraft.  While it’s only the two practice kits (Toolbox and Training Project), I also decided to purchase the digital copies of the RV-10 plans.   I’m expecting to begin the Toolbox project next weekend when it arrives, followed by the RV Practice Kit.  Hopefully this keeps me busy until I head down to Sun ‘N Fun!

I have also been speaking with Mitch Locke from Vans, and hope to get some time with him once I get back from Sun ‘N Fun to do a demo flight in his RV10 with my wife.  Depending on how that goes, I hopefully will be ordering my empennage kit.

While I really just want to pull the trigger on the empennage kit, I can’t imagine committing to such a major project without at least sitting in and getting a demo of the RV10.