Jumping around again, I’m back to the Aileron Actuation chapter. I decided I needed to start preparing the torque tubes as well the pushrods. After pulling down the aluminum tube for the torque tubes, I measure how long they need to be and trim them off on my bandsaw in an attempt to keep the ends square. Once done I give both ends a quick deburr and set them aside.
Next I mark and measure the pushrods and figure out how best to cut them to size. Too long for the throat on my bandsaw, so maybe I can use my hacksaw? Kinda works, but the blade keeps wanting to jump, so I end up grabbing my Dremell and a cutoff wheel. Some sparks followed by a quick touch up on my belt sander they are the correct length.
Next I need to sand down the rod ends and the inside of the pushrod so everything will fit together. (You will need to prime the parts, so slightly OVER SAND to account for the thickness of the primer.) Manually sanding the inside of the small pushrod sucks, and don’t have a great solution for this yet. Sanding the outside of the pushrod ends is easier. Chuck it in the drill and hold some sandpaper against while you pull the drill trigger. Works well!
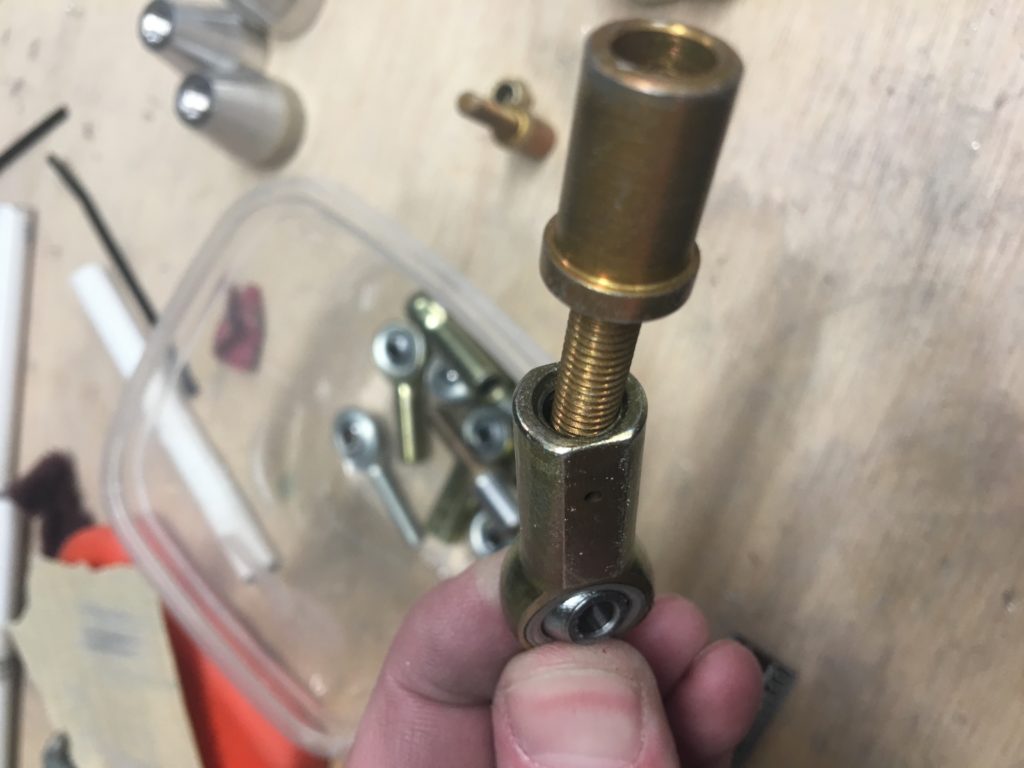
I then looked for the additional hardware to attach to the rod ends and was puzzled that the screws would not thread on the female bearings. Had to double check the packing list and directions a few times before I sent off a note to Vans. (see photo below). One thing Vans isn’t great about is communication. After waiting a week for a reply I finally called to find out that they had a bad batch from their supplier and the Parts department would be sending me a new set. A few days later, I got an e-mail that new bearings were headed my way and I needed to send the wrong parts back to them. Not a huge deal but a quick e-mail back to me saying “yep, you have the wrong part from us. We’ll fix it in the next week or so” would have reduced my stress!

Anyway, I move forward to drill the holes to attach the rod ends known those are the correct parts now. Mark holes with center punch, drill pilot holes by hand. Use Drill press with centering block to drill through the pushrod.
Here is where I kinda messed up. when you go to drill the pushrod ends, do this by hand / don’t try to drill all the way through both ends on a drill press. I ended up making a few of the holes look like an 8 and overall just think I can do better. For now I’m building on, but most likely will purchase a new pushrod and pushrod ends before first flight. Maybe add them to my finishing kit?
All for now until I can prime these parts.