Practice Project completed

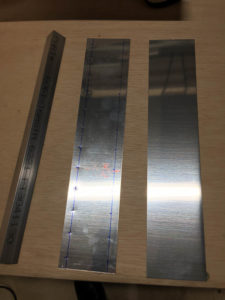
Yesterday with the assistance of my daughters, I was able to complete the control surface practice project.   I love how it went together, and all the little mistakes I made along the way.  Honestly this was exactly what I was expecting with a practice project to help figure out where I needed some additional tooling, education, or simple practice!

I continue to buy an additional tool here and there, and the most recent that I’m thrilled with are my scotch bright disks for my air die grinder.  I have been more inclined to use them than my scotch bright wheel in my bench grinder.  I feel like I have more control on the pads vs the bench grinder, but that may change as I get more experience and begin to work with more parts.

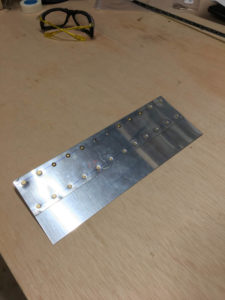
I ended up mangling a bunch of rivets as I attached the skins to the spars.  This required me to drill out a few rivets and use some “Oops” rivets.  Luckily that worked out perfectly.

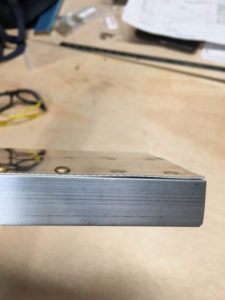
Bending the radius in the leading edge wasn’t as clean as I really wanted it to be.  Honestly I just couldn’t bend it enough that there wasn’t pillowing.  I even attempted to use the edge forming tool, but that didn’t seem to help much.  Finally I just went with it and with the help of my youngest daughter, started to blind-rivet the leading edge together.  Daddy and daughter did a great job on 4/5 rivets, however one didn’t seat very well.

Not a huge deal, but I’m planning to drill out all 5 of the blind rivets when my removal tool arrives and install all new blind rivets.  (also debating drilling additional holes and adding more rivets to make a better seam.).  This is the time to experiment and get better right?


Practice project. Step 8 completed

Ok, so family visits and lots going on mean I really didn’t have much time to “play” in the garage. I did get the blind rivet dimple tool, but it wouldn’t work on the ribs. Quick trip to Home Depot for some steel and I made the custom dimple bucking bar.

At this point I have the skin, spars, and ribs dimpled. (Didn’t seem like the spar needed to also be countersunk but will have to verify before I begin to rivet.  The squeezer and substructure die combo looks like it was perfect).

Also countersunk the trailing edge. Again need to verify they were deep enough as I test-fit everything prior to riveting.

Maybe tomorrow night I may have time to do some more work.

Progress on Practice Project #2

Ok, so I think I got just about as far as I can at the moment.  Skeleton of the control surface is riveted.  Had a small issue with a slightly folded over rivet so I drilled it out a few times.  (Guess it was good practice for me, so not too upset).

[inpost_fancy thumb_width=”200″ thumb_height=”200″ post_id=”120″ thumb_margin_left=”0″ thumb_margin_bottom=”0″ thumb_border_radius=”2″ thumb_shadow=”0 1px 4px rgba(0, 0, 0, 0.2)” id=”” random=”0″ group=”1″ border=”” show_in_popup=”0″ album_cover=”” album_cover_width=”200″ album_cover_height=”200″ popup_width=”800″ popup_max_height=”600″ popup_title=”Gallery” type=”fancy” sc_id=”sc1489411902319″]

Got the trailing edge drilled and the skins dimpled.  Also dimpled the Skeleton structure with the exception of the tight areas at the tip of the ribs.  Decided to order the pop-rivet dimple tool to see if that will work, or if I need to make the dimple die tool that was part of the project.  (I may make it anyway just to see the difference.  Maybe dimple each rib with a different method?)

Only thing I’m not thrilled with is my edges.  I tried to use my bench grinder to smooth my skin edges, but honestly that didn’t work very well.  Not sure what the “recommended method” is, but I have a feeling this is something I’m going to be asking about when I go to the workshops at Sun n Fun.  I have had mixed success using my bench grinder with the Scotch Brite wheel.  Think I’m just not using it right, or need to work on my technique.

[inpost_fancy thumb_width=”200″ thumb_height=”200″ post_id=”120″ thumb_margin_left=”0″ thumb_margin_bottom=”0″ thumb_border_radius=”2″ thumb_shadow=”0 1px 4px rgba(0, 0, 0, 0.2)” id=”” random=”0″ group=”2″ border=”” show_in_popup=”0″ album_cover=”” album_cover_width=”200″ album_cover_height=”200″ popup_width=”800″ popup_max_height=”600″ popup_title=”Gallery” type=”fancy” sc_id=”sc1489411910733″]

Looks like I’m at a holding spot on my projects for the next week until I get some things in the mail.  Decided to get a new Hinge, as well as two more toolbox kits for my girls to build.

Practice Project #1

As I was reviewing the plans the other day, I realized that I had skipped the first practice project completely.  Oops!  So decided I would complete that before I went back to the control surface project.

First step, was to mark up one of the sheets and measure where to center punch for each of the rivet holes.

Using the cleco clamps, make the first hole, install a cleco and continue down the line.  Deburr all the holes, then figure out how to install (dimple / countersink) for the AN426AD (flushmount) rivets.  The sheet is too thin to countersink, and the metal bracket below is too thick to dimple.  I’m totally guessing at this point, but I decided to dimple the skin and countersink the “L” bracket to allow the sheet to sit flush.  (did a few tests on some scrap pieces, and thought this was the best choice!).

Once everything was appropriately dimpled and countersunk, I started to rivet.  Two center rivets were Blind (or POP) rivets.  Fairly easy.

Next, 3 of the AN470 on either side of the pop rivets.  This is where I really enjoy having the squeezer.  A little minor tweaking of air pressure and squeeze distance and my AN470AN4-r rivets were set.

Lastly I set the AN426AD4-4 rivets in the dimpled / countersunk holes.  Honestly I think my dimple or countersink on one of the holes may have been slightly off (or not deep enough).  Looks like the final sheets didn’t sit completely flat.

Sheet to sheet with the AN3 rivets was quick and easy.  If I had additional blind rivets, I might try to drill the first row out and adjust the countersink.  I’ll have to think about it.

Structural Dimple Dies and Back Riveting

Decided to purchase a set of Cleveland Tool Structural Dimple Dies to see how they work since the Practice kit is a great place to try some new things!

Got the Ribs deburred and match drilled.  Used my standard dimple set to dimple the skins, then switched to the new structural dimples to dimple the ribs.  Wouldn’t you know the structural dimples worked as advertised.  (Sorry, in my excitement I didn’t take pictures!)


On to back-riveting, went ahead and put the rivets in the skins and taped them down.  Flipped the piece over and added the ribs.  Back-riveted 2-3 rivets before I had to call it a night as I was making a bit too much noise at 9pm.  Oh well, I’m all set up and ready to start again on Friday afternoon.  I have a feeling I’ll have the control surface completed by the end of the weekend.