Fuel Tank – Part 7

So slightly out of order, but figured I would provide a quick update on my fuel tanks. I found myself with some spare time to work on the airplane due to my wife and daughters taking a trip to visit my mother in law. This is great except for one minor detail, I basically ran out of things I can work on by myself and need a second set of hands. Local buddies were are also unavailable so time to get creative.

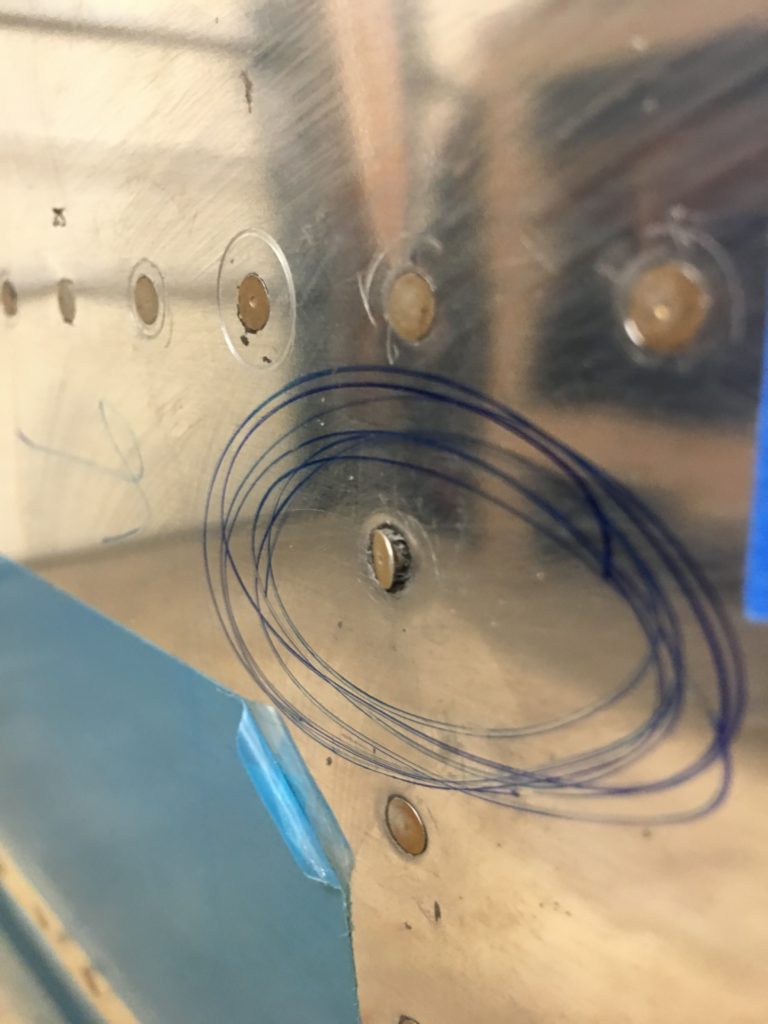
Decided to bring the fuel tanks back from our storage locker and finally pressure test them. Going in I already knew I would need to cut a hole in my right tank to replace a rivet that somehow wasn’t fully set?!? Before I drilled it out I wanted to verify there were no other areas that needed attention (leaks).

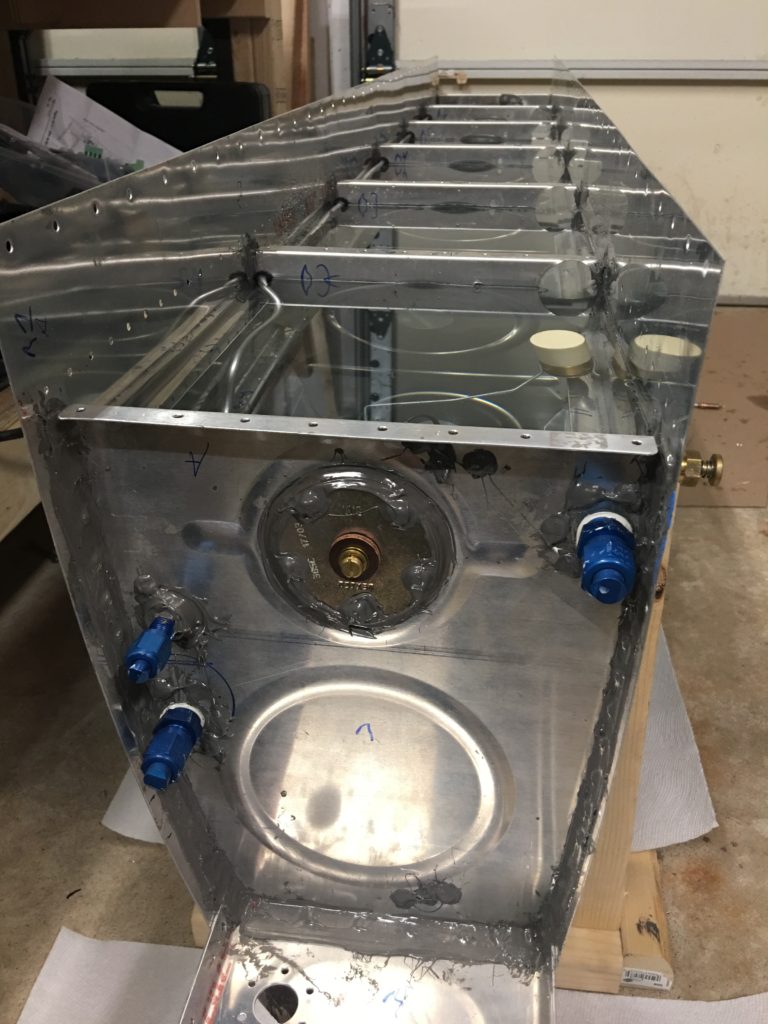
With the fuel lines (supply and return) capped, and a balloon on the vent line, I used the fuel drain line to blow into the tank and slightly inflate it. (Just a few breaths to put a little pressure in the tank, not enough to inflate the balloon). Then its on to spraying soapy water all over the tank. On the first try, I got a leak around the fuel cap and the threads of the fuel supply and return. Tightened the caps on the fuel lines, and tightened the screw on the fuel cap. Re-spray and no leaks. Ok, so a tank in good shape. Now for the difficult part (emotionally that is).

With the hole cut in the tank and the edges deburred, I was able to get into the tank to remove the proseal from behind the “bad” rivet and drill it out. Note: removing the proseal from inside the tank SUCKS! Make sure all rivets are properly set to avoid this torture!

Once the area when the rivet needed to be installed was cleaned, and all the dust and debris was removed from inside the tank, I was barely able to install a replacement rivet. Honestly I almost gave up and was looking for an appropriate flush blind rivet, but in the end I was successfull in installing the new rivet (pending leak test).

With the rivet installed, I added a bunch of proseal to the area to prevent any leaks in this area, followed by installing the access hole cover. No way this patch will leak due to the large overlapping surface and overkill number of blind rivets. Now I’m just waiting for the proseal to cure before I attempt a pressure test. The other tank was perfect, so I already mounted it to the left wing with just a few bolts / screws. I’ll get more photos of the tanks mounted in a future update.

Next week, I’ll be in Chesapeake VA attending the RV Fiberglass class to practice making the windshield layup so don’t expect any real updates for a few weeks.

Fuel Tank – Part 6

Well, it is time to finally seal up the fuel tanks. To begin this process, I first leak tested the tanks with tap water just to make sure there were no obvious leaks. Easy enough to do, put the tanks in the cradle, and fill with as much water as you can before it spills over one of the sides. Then put some paper towels down under the tank to help show if there was a leak.

I found a small leak on both tanks, but both instances were from the blue AN hardware that just needed to be tightened. No leaks from rivets or seams so started to feel confident that I could seal up the tank.

Next, I got everything ready to seal the tanks. I primed the back of the baffle as well as the tank attach Zees. With everything collected, I set aside a few hours to get it all assembled For the first tank, I mixed a batch of proseal from my pint container as I ran out of the pre-measured tubes (ordered more for the second tank). Then into the SEMCO dispenser and applied a good bead to all the tank baffles and the skin edges. I made sure to put a larger glob in the corners of the inner and outer baffles as there is a decent gap there. I also spread the sealant out to ensure full and even coverage.

Next, I dropped the baffle into place and clecoed every hole along the skins and outer ribs. Following the directions, I then rivet the outer rivets on all of the ribs, followed by installing the attach Zees and blind riveting them into place (dipping the ends of each blind rivet into proseal). Then it’s on to riveting the skins to the baffle with the exception of the non-countersunk holes. Let the proseal set up about 24 hours, then countersink and rivet those last few locations.

All went wonderful for both tanks, until I was just about done, when I saw the following:

Much cursing and and anger followed, but honestly it is what it is. I’m guessing this rivet wasn’t fully set for one reason or another but I failed to notice it. Maybe it got caught on the cradle and pulled the rivet head? Who know, but this does mean I’ll have to install an access panel on this tank. Already reached out to Vans and think I know what I need to order. Just waiting for the proseal to fully set (30 days) then I’ll do a pressure test on both tanks to make sure there are no other areas that need repair before I order the access panel kits. If this is the only thing that needs to be fixed, I’ll be thrilled!.

Currently the tanks are sitting in storage. I have all the holes plugged and tank cap on. With the temp changes, I’m expecting some pressure build-up in the tanks and last time I opened the fuel cap, I did hear the pressure equalize. This makes me fairly confident that I have a good seal at the moment. Fingers crossed. For now I’ll keep the tanks off the wings until I’m done pressure testing and repairing the bad rivet.

Fuel Tank – Part 5

Ok, so I’m officially sick and tired of proseal. With that said, I’m walking away from it for a few months before I finish up the fuel tanks.

With that said, I now have two mostly completed fuel tanks and once all the pro-seal cures, I can begin leak testing. I’m going to give the tanks a few months so that I have warmer weather before I start leak testing. (Honestly that is an excuse so I don’t have to mix any proseal for a bit).

I did my best to film the whole process this time as it takes MULTIPLE sessions to get this done. I bounced back and forth between wet-setting things in one session and allowing the proseal to set with the ribs fully clecoed in place. Also I had one LUCKY mistake when back-riveting the stiffeners. I did not mark or bend the skin, but drove the rivet into my table as I missed the backing plate.

I also started to rivet the ribs in the wrong order, but caught myself and only had to clean up a little proseal. Not a huge deal and I’m sure if I did install that rib first it would have been fine.

Lastly I realized I installed the fuel vent line incorrectly on my right tank. I missed there are two sets of holes that you can use to run the fuel vent line. The one closest to the nose is the correct one and makes life so much easier. The other set of holes is for the fuel to get to the fuel pickup. I have a feeling I’ll need to “fix” my right wing before I seal it up. (will also need to muck with my fuel float again. GROAN!). Not an impossible fix but have to think it though. EDIT: no dummy, fuel vent is on the top of the wing. I’ll still have to look to see if there is any good reason to re-route the vent line before I seal up the tank. Currently leaning towards leaving it alone.

I’m also really happy with my ductless mini-split system. With almost 8″ of snow outside I was still able to finish up my fuel tank in a t-shirt and be quite comfortable. Anyway, now it’s time to clean up the shop and get the flaps and ailerons before the fuselage shows up!

Fuel Tanks – Part 4

With the fuselage on order and a deadline to get the garage ready, time to get into gear and make progress. Granted we are now in prime holiday season and family is the higher priority over building, so this it’s more of the same get a few mins here and there to keep making progress.

Decided to bundle all of the prep for the right tank into a single video even if that made for a slightly longer wait / longer timelapse. Nothing special or different from the left tank. Deburr edges, install the structure and match drill. once fully assembled, take it all apart and start deburring.

I did make updated tank / leading edge cradle based on the plans finally. It did help a little with getting the ribs to line up. (also needed another cradle anyway).

Got all the parts dimpled and ready to begin final assembly. The only thing I did slightly differently was I didn’t install the nutplates for the Zee’s yet as I’m still deciding on if / how I’m going to prime the tank. I also am waiting to mount any of the shims to the tank attach bracket until I decide on priming. (after I leak test the tank).

Just like the left tank, I also installed a fuel return port. Slow but somewhat steady progress.

Fuel Tanks – Part 3

Ok, so while I’m getting better at the whole Proseal thing, I’m not a fan.  Also due to some of my dislike of the whole process I really was not in the frame of mind to start the camera.  I’ll attempt to better capture my struggle with the next tank, but no promises!

At this point I have basically finished up everything on the first tank with the exception of the rear baffle.  I also have a handful of rivets I need to remove and reset as they didn’t go in flat or the shop head didn’t form correctly.  Once that is done, I’m going to put the tank into storage for a month or so to allow the proseal to fully cure.

Some notes on this section.  The fuel drain does not fully seat into the flange.  At first I thought this was due to some proseal in the threads or something else, but no this is normal and don’t force it to thread in too far.  (Snug then just a little more!)  Installing the fuel vent line was a little bit of a pain and required some fiddling to assist in getting the fuel float installed.  The plans give you an example, but does not really reflect reality!  Same goes for the fuel float.

For the fuel float, spend time to understand how everything gets assembled before you cut anything.  I originally thought I was completely hosed, but I think I did ok.  VANS no longer sells replacement wire / floats as the MFG no longer offers replacements (changed in early 2018). The end of the wire is a “L” and goes through the sender and clips into the arm.  That should make sense when you look at the sender.

I initially made the 4-1/8 x 4″ bends per the plans, but then had to make some really funky bends to get the wire and float to clear the vent tube / ribs.  I tried to get my float and sender to fully bottom out on the bottom of the tank just before full deflection on the sender.  I think I’m basically full deflection with the float against the skin, and I’m against the top of the tank before full deflection in the full position.  Double checked with a multi-meter to show 240 Ohm empty and 50 Ohms full.

Last items I need to do before I put the tank into storage is proseal the vent fitting and fuel sender and install the fuel supply fitting and fuel return fitting (no proseal).  I’ll then cleco the rear baffle in place and put it away.

After the holidays I’ll probably jump back to the Leading edges to fix a few rivets, finish up the Leading Edge lights and plexiglass.  Then maybe the top skin on the Left wing depending on weather and my ability to spray primer.

[inpost_galleria thumb_width=”200″ thumb_height=”200″ post_id=”726″ thumb_margin_left=”3″ thumb_margin_bottom=”0″ thumb_border_radius=”2″ thumb_shadow=”0 1px 4px rgba(0, 0, 0, 0.2)” id=”” random=”0″ group=”0″ border=”” show_in_popup=”0″ album_cover=”” album_cover_width=”200″ album_cover_height=”200″ popup_width=”800″ popup_max_height=”600″ popup_title=”Gallery” type=”yoxview” sc_id=”sc1542728016219″]