Two years into the build!

Wow, I’m surprised that it was only 2 years ago that I took delivery of the Empennage kit. Seems like I have been working on this project for longer than that! It’s hard to picture my garage without all the airplane stuff in it. Overall I’m still quite happy with my progress even if the wings really challenged my sanity!

At this point I have the empennage done, wings mostly done (still have a few items to finish up), and making progress on the Fuselage. I’m getting towards the part where I’m getting budget limited vs time limited. Parts and upgrades are starting to get more expensive and I’m constantly wondering when I’m no long going to be able to pay for things in “cash”. Engine and avionics will require some sort of loan, or the project is going to sit in the garage for a few years as I save up.

I still don’t have a hangar yet, but did put my name on the waiting list at Manassas Airport (KHEF). There is talk that construction is going to begin shortly that will demolish a good portion of the T-hangars on the field and rebuild new ones further back to allow some upgrades to the runways. They can only delay so long before their environmental studies have to be redone so it sounds like things will be a little crazy in the near future. This is also going to impact our local EAA chapter and build hangar/clubhouse.

I decided to skip Sun N Fun this year and instead head to Oshkosh. Planning to drive just in case I find some good deals (Not opposed to flying if someone has an extra seat however!). Also planning to camp there as I don’t want to deal with finding a hotel / driving back and forth to the grounds. (If needed I can sleep in the trunk of my SUV to stay dry). I’m hoping that by the end of the year, I’ll be close to having a fuselage I can sit in / working on the fiberglass parts. I have a little extra vacation time saved up so I’m sure I’ll be taking time off to work on the airplane.

The one thing that is suffering is my flying. I’m maintaining my currency, but not my profeciency. Somewhat of a deliberate choice as my funds are really dedicated to building. Granted maintaining IFR currency is a lot easier and cheaper with the updated rules. 2 hours of sim time every few months – easy! When I’m ready to start flying beyond some pattern work, I’ll grab a local CFI and get all the rust knocked off. Then find someone to get me some transition training.
Mid Fuselage Bulkhead – Part 1

With the Fuse delivered I wanted a break from working on the wings. Flipping to chapter 25, I start to work on the fuselage!

Starting off I have to fabricate some stiffener brackets out of angle aluminum. Looking at the stock sent in the kit it I attempt to figure out what length of angle to cut. Since I ordered an extra 6 foot section “just in case” I go ahead and use one of the 3 foot sections for these parts as it looks like they include extra length anyway.

Once that’s done, I make the appropriate marks, match drill the stiffeners, then jump into making the seat brackets. Lots of final drilling of parts as this is a pretty beefy structure. I may have overdone it a bit by taking parts off after drilling them to deburr, only to have to re-install them again to drill something else. Nothing wasted by my time, so it’s fine.

Looks like the more recent kits from Vans already have the appropriate cutouts on the spar (25-3: Steps 1-3), so that was nice. Then it was on to prepping the landing gear supports for attaching to the spar. I had to deburr and fiddle with the drill busing called out in step 4 to allow my drill bit to sit nicely in it, but that wasn’t too bad. Used plenty of BoeLube to keep the drill bit cool as I drilled the larger holes.

Once done (off camera) I made sure everything was labeled and then disassembled and deburred so I could prime.

Fuselage Delivery

IT’S HERE! IT’S HERE!

I’m just a little excited for the fuselage to be delivered. Communication from VANS leaves a bit to be desired. They sent all the paperwork with a crate date of Feb 18th so I was still under the impression that my date had not slipped. But when I didn’t hear anything from them by Feb 28th, I sent a nice message asking if they could send me the shipping info. That’s when I find out that they were really busy getting these orders out and mine hadn’t been started yet. Maybe another week or two at that point.

Luckily I did get notified on March 5th that my crate was ready for pickup by the shipper. I was able to track it and it was scheduled for delivery on March 15th. (Small note, I was actually charged less for the shipping than what VANS indicated on their paperwork. Not that I’m going to argue!)

Truck arrived around 4pm and was able to easily get the crate offloaded. Shipping dimensions were spot on so I was able to clear sufficient space to put it in the garage while I unboxed everything. Pleasantly surprised that I have NO DAMAGE on my crate this time.

My goal was to get the cabin top out of the box and hung from the ceiling as well as getting the crate broken down as much as possible as quickly as possible. (I really only had Friday as I had lots of family obligations for Sat and Sunday!)

While the kids played outside, I easily unpacked most of the items in the crate. Had to get some assistance from my wife to remove the cabin top, then get it in position to lift using our bicycle hoists. Not perfect, but secure enough for a few months. Bikes are stored in the shed as we really weren’t using them much anyway.

Ended up taking another day off mid-week to inventory everything and store everything in the garage. I’ll say this, VANS did a great job on packing the kit and all the sub-components. Nothing was damaged or poorly packed, and I was only missing three items. (Two ribs and one nut). HUGH improvement on what was missing from previous kits.

Ailerons – Part 3

Had another marginal weather day that allowed me to prime a handful of parts. With the Fuselage delivery date just a few days away, I stole a little time in the garage after work to get just a little more progress.

I rivet the hinge bracket to the rib and begin to dimple the skins. With that completed, I being to lay out the stiffeners and start to back rivet everything in place. Before I start to rivet the top skin, I go to attach the bottom skin to the spar and realize that this skin is really the right aileron vs the left.

Totally my fault as I was having difficulty “seeing” everything as it went together. Possibly because I had the fuselage on my brain, but with the parts in front of me starting to go together things are making a lot more sense. (When unsure stop and figure it out!)

No big deal, but it also showed that I counter sunk the wrong side of the right hings brackets. Quick call for replacement parts and I’m in another holding pattern. Luckily nothing incorrect was riveted together so I’m still in good shape.

Aileron Actuation – Part 2

Jumping around again, I’m back to the Aileron Actuation chapter. I decided I needed to start preparing the torque tubes as well the pushrods. After pulling down the aluminum tube for the torque tubes, I measure how long they need to be and trim them off on my bandsaw in an attempt to keep the ends square. Once done I give both ends a quick deburr and set them aside.

Next I mark and measure the pushrods and figure out how best to cut them to size. Too long for the throat on my bandsaw, so maybe I can use my hacksaw? Kinda works, but the blade keeps wanting to jump, so I end up grabbing my Dremell and a cutoff wheel. Some sparks followed by a quick touch up on my belt sander they are the correct length.

Next I need to sand down the rod ends and the inside of the pushrod so everything will fit together. (You will need to prime the parts, so slightly OVER SAND to account for the thickness of the primer.) Manually sanding the inside of the small pushrod sucks, and don’t have a great solution for this yet. Sanding the outside of the pushrod ends is easier. Chuck it in the drill and hold some sandpaper against while you pull the drill trigger. Works well!

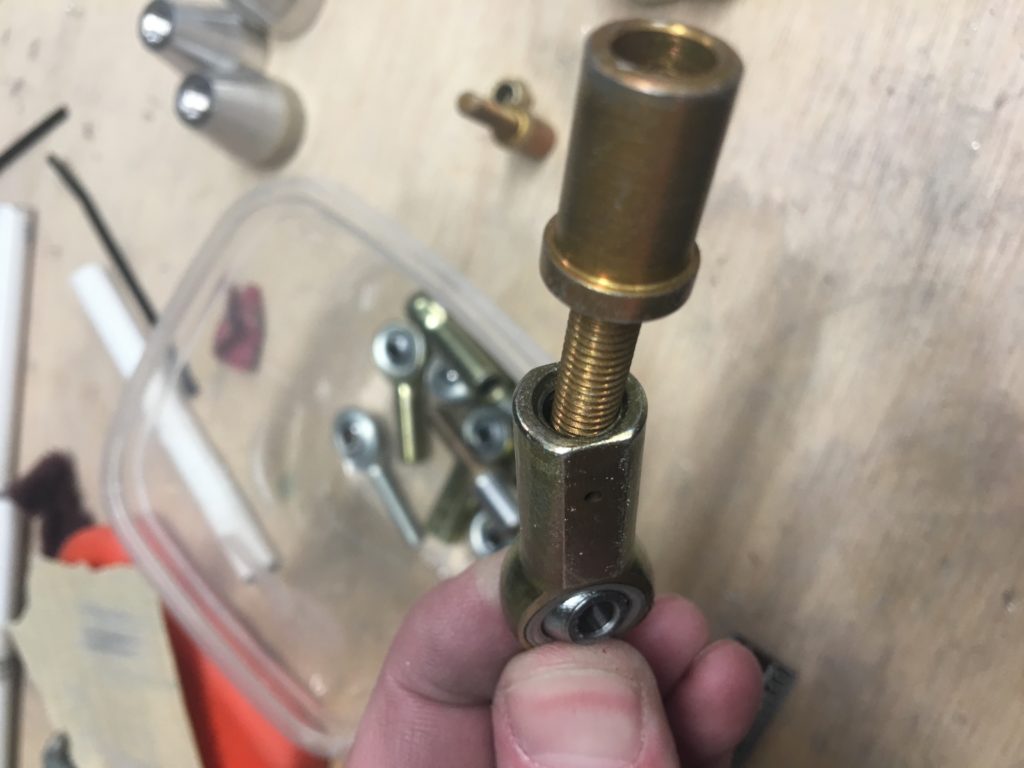
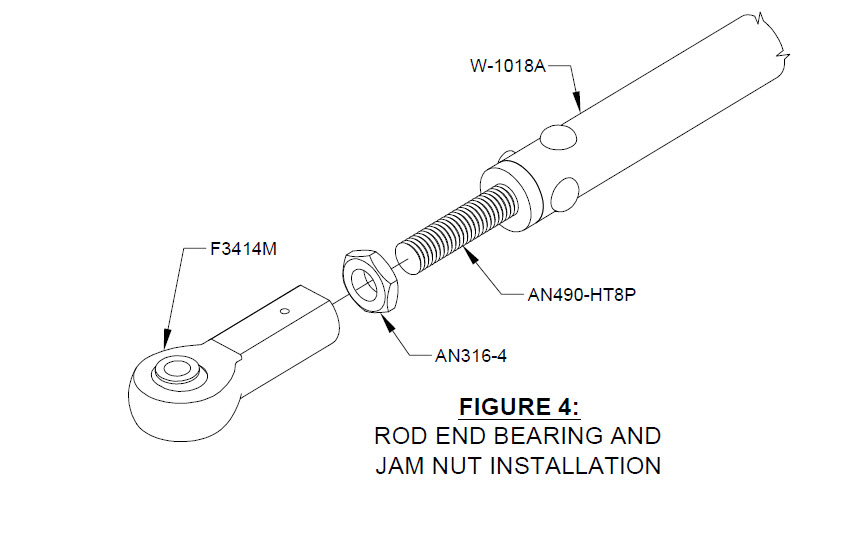
I then looked for the additional hardware to attach to the rod ends and was puzzled that the screws would not thread on the female bearings. Had to double check the packing list and directions a few times before I sent off a note to Vans. (see photo below). One thing Vans isn’t great about is communication. After waiting a week for a reply I finally called to find out that they had a bad batch from their supplier and the Parts department would be sending me a new set. A few days later, I got an e-mail that new bearings were headed my way and I needed to send the wrong parts back to them. Not a huge deal but a quick e-mail back to me saying “yep, you have the wrong part from us. We’ll fix it in the next week or so” would have reduced my stress!

Anyway, I move forward to drill the holes to attach the rod ends known those are the correct parts now. Mark holes with center punch, drill pilot holes by hand. Use Drill press with centering block to drill through the pushrod.

Here is where I kinda messed up. when you go to drill the pushrod ends, do this by hand / don’t try to drill all the way through both ends on a drill press. I ended up making a few of the holes look like an 8 and overall just think I can do better. For now I’m building on, but most likely will purchase a new pushrod and pushrod ends before first flight. Maybe add them to my finishing kit?

All for now until I can prime these parts.