Finish Kit Delivery

Well, I’m not sure if the timing on this was great, or horrible. I submitted my order for my finish kit in late January. I did this for a few reasons.

  • I needed something to motivate me to progress faster. Nothing like a deadline to get you moving.
  • I had the funds for the kit and figured I should order now in case prices went up (or I might spend it on something else)
  • I thought I was far enough along that that this was when I “should” order the kit.

My crating date was the week of March 23rd and with all of the recent stay at home and social distancing orders, I was worried that this may have an impact on my kit. After talking to the wonderful staff at Vans, they told me they were taking things seriously, but doing their best to keep things moving. Sent in my final payment and figured things may be delayed a few weeks from VANS side, or possibly the shipper.

NOPE, Vans had their stuff together, and sent me the shipping information on 3/27. Shipment arrived in Maryland on 3/31 and was contacted to set up my delivery on 4/2. With the news getting worse each day regarding COVID-19, I was absolutely shocked that this was going to happen.

I then had a minor panic attack as I tried to figure out WHERE I was going to put the crate as things are getting tight in my garage. After a little bit of jenga, I figured out something that would work for a few days as I unpack the crate and inventory everything. I’ll have to start stuffing parts all over the house, but I’ll make it work.

Maybe the silver lining is that I will have enough to keep me busy on the airplane over the next few weeks / months. I think I have most of the supplies I need and crossing my fingers that PPE gear starts to flow again. Lots of front line people really need that gear now, but hopefully once they have what they need, we can begin to get it back in stock for those doing other projects. Currently I’m down to my last box of gloves and the filters currently in my respirator. I’m sure I’ll need more before I start the fiberglass work.

With the crate delivered, I had almost no room to move around, so it was time to quickly unpack and inventory the kit. Bulky items (doors and cowl) and other fiberglass parts were inventoried and moved to storage while all the other stuff was relocated to shelves. The Bag of hardware was checked and returned to the original bag for storage. Only two errors this time. No Spinner, and got an incorrect sub-bag of hardware. Reported back to the mothership and a the missing items are already on the way.

Fuel pump, Fuel lines, and Brake Lines

I decided a bit ago to reach out to Steve from ASFlightline to get some upgraded hoses for my fuel and brake lines. Could I have just made my own? Sure, but I wanted something a little more sturdy running through the cabin.

When I contacted Steve, AS Flightline did not have a standard EFII kit for the SDS EM-5 system. The did have one for the FlyEFII System 32, so after discussing with Steve, he shipped me that set and I would work with him to develop the changes necessary to support the SDS kit as a drop-in package. I also ordered the brake line hoses for my control approach pedals.

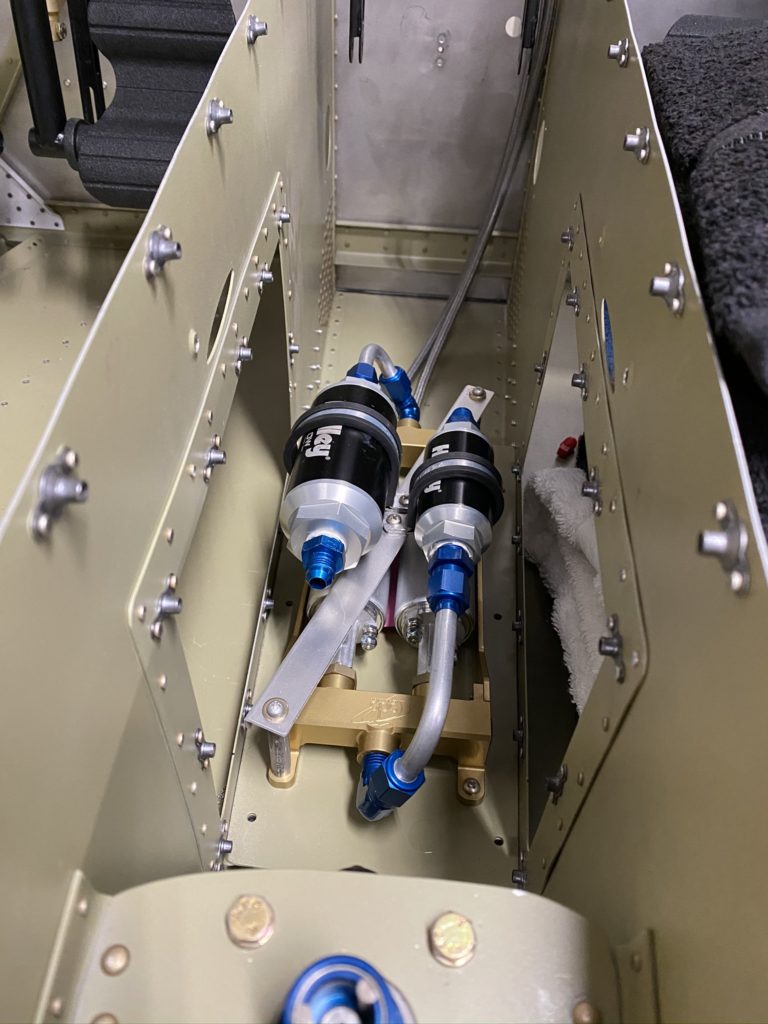
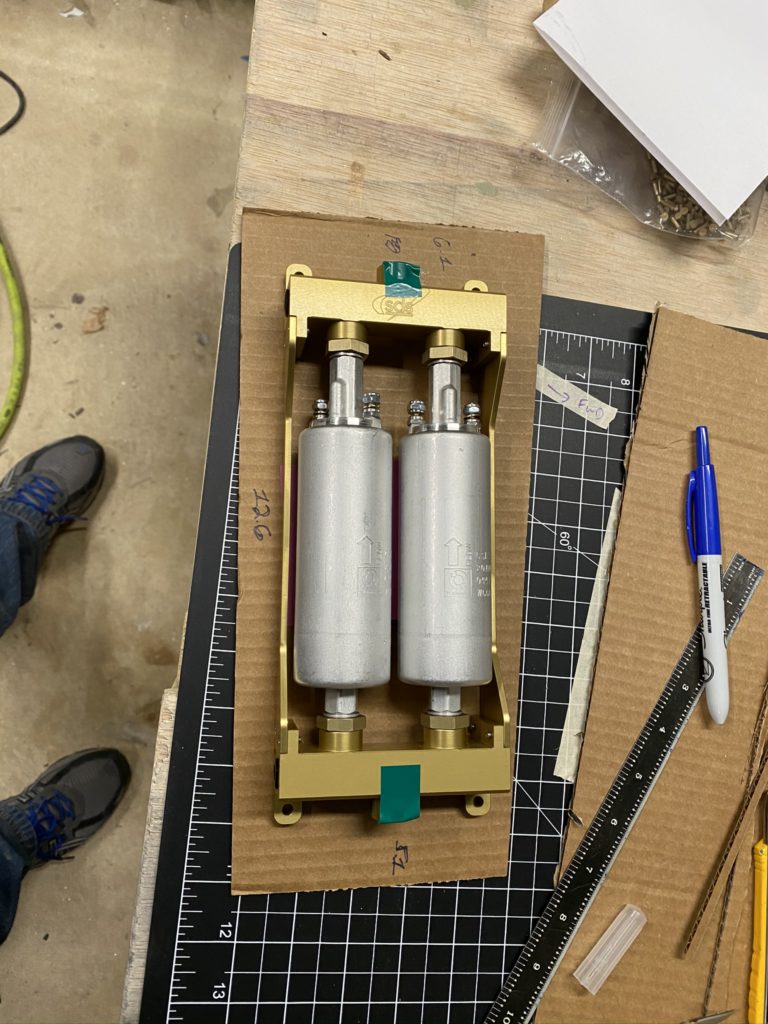
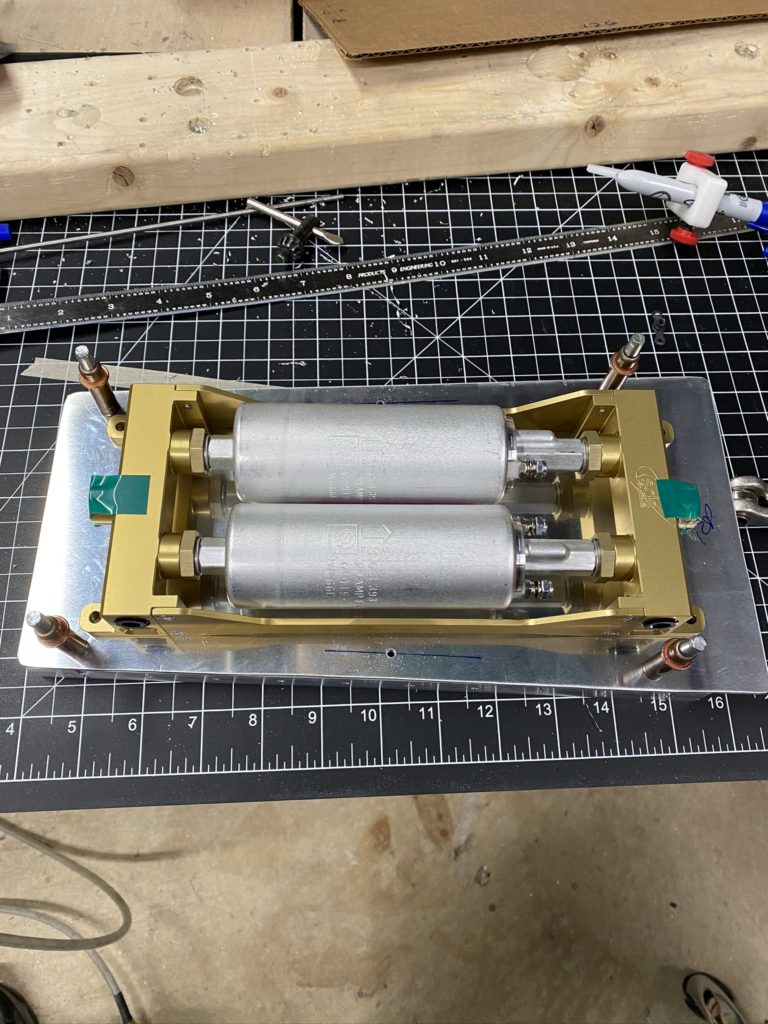
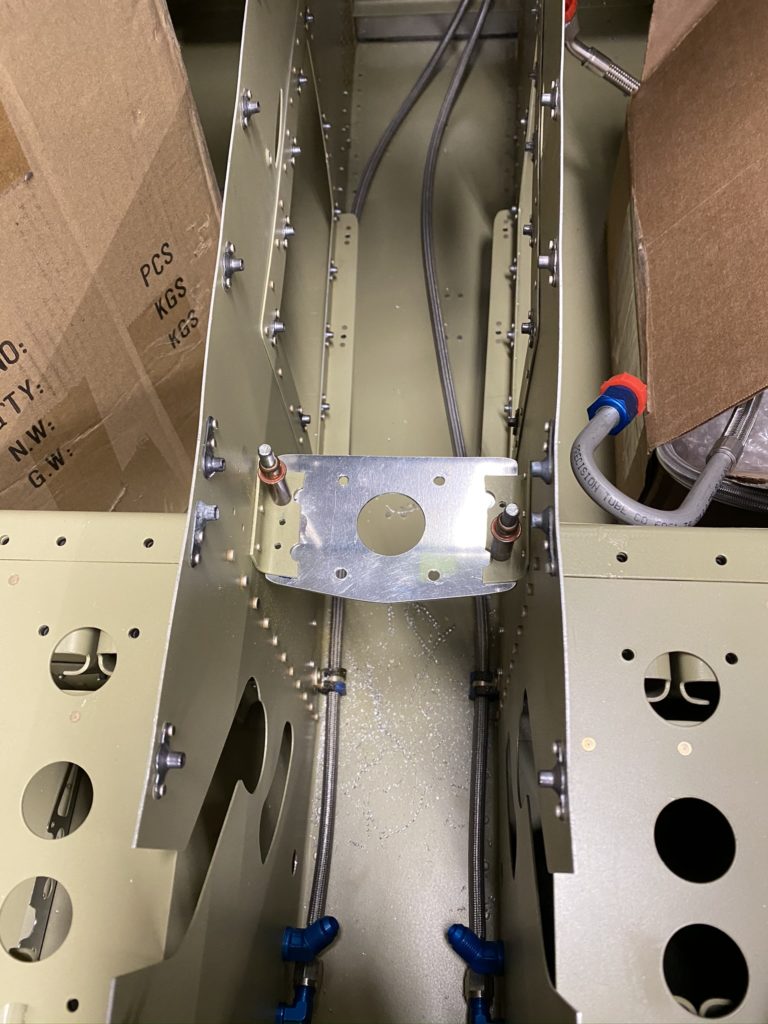
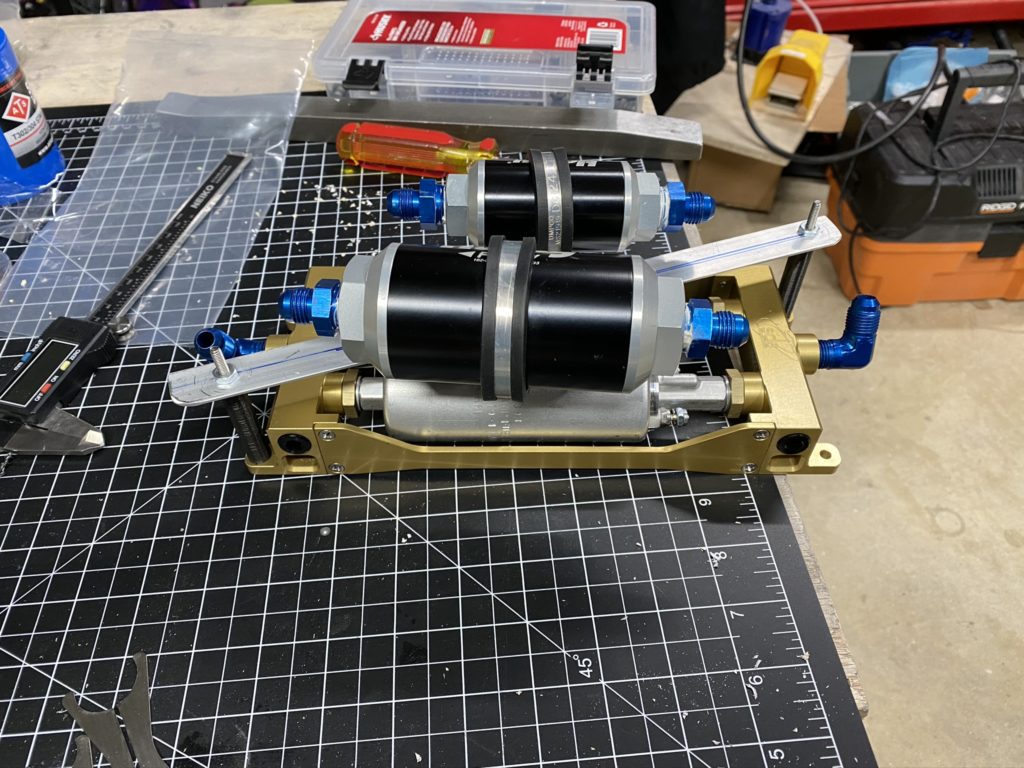
First task was to come up with a mount for the fuel pump assembly from SDS as well as the two filters. I had seen a few people that mounted their pumps with the filters above the pumps in a compact package, and that seemed to be a neat setup. Working with Steve, we developed a mounting setup and some hard-tube that would work with the proposed hose kit.

I shameless followed a similar setup to the EFII system 32 doc on the AS Flightline site to mount my pump in the tunnel. 3/4″ angle aluminum just below the tunnel opening, and fabricating a mounting plate for the pump. The whole pump assembly can be removed via the AirWard side tunnel access panels for servicing. Will verify once all the other “stuff” is installed in the tunnel.

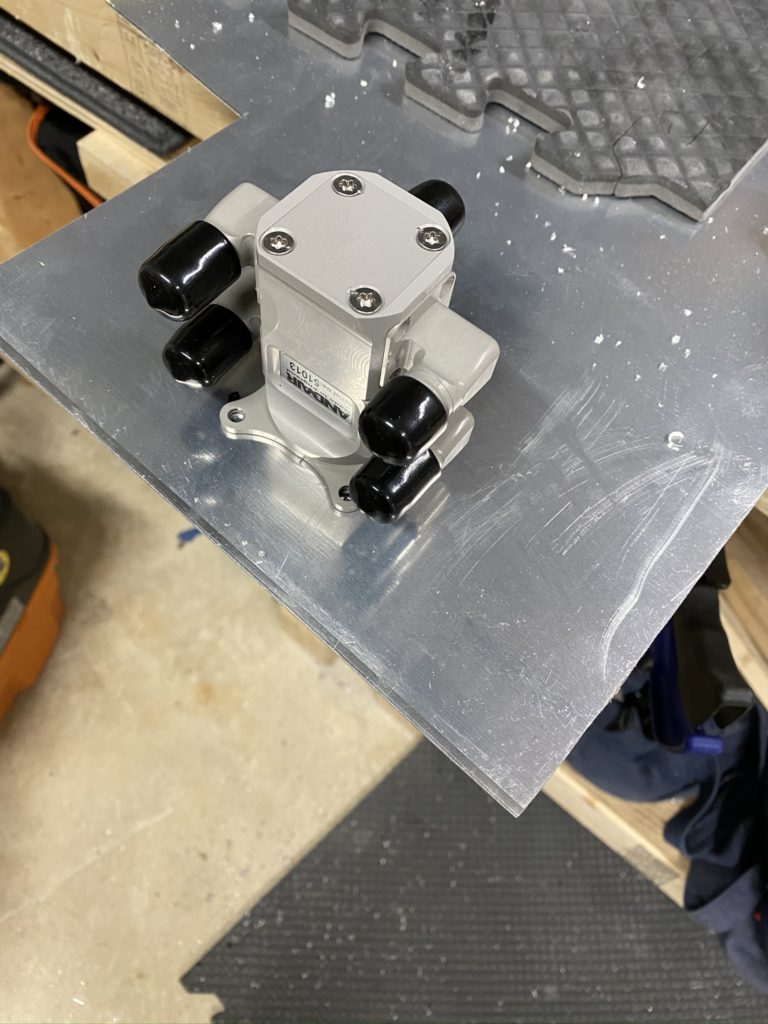
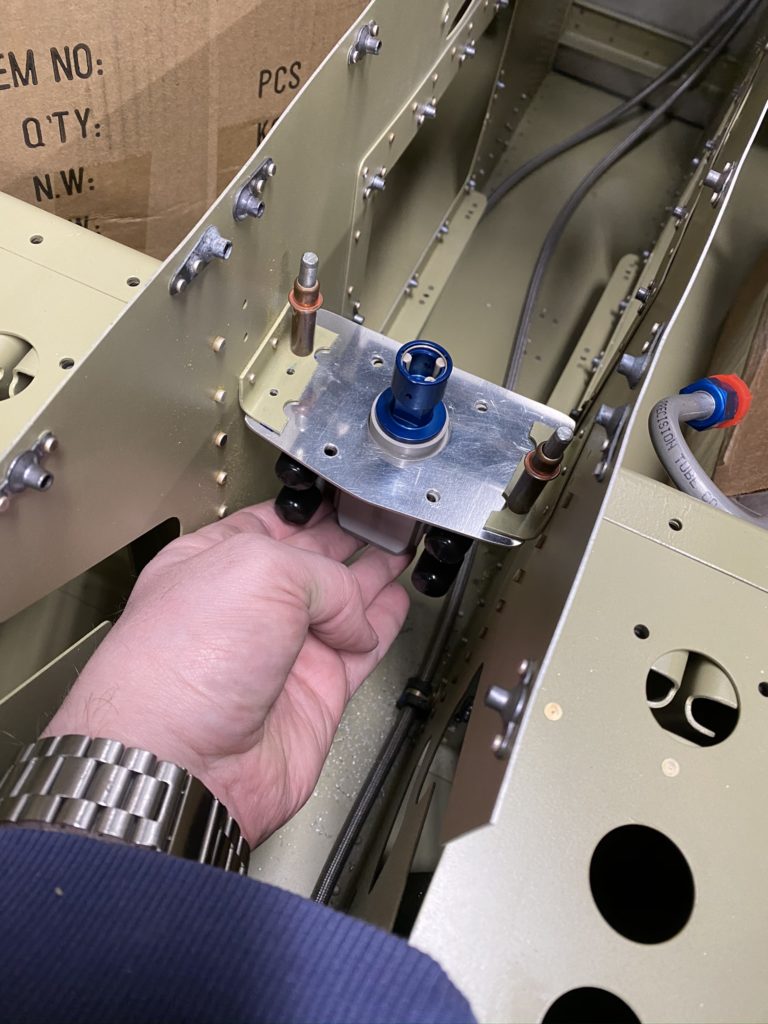
Then I was waiting on my duplex Andair fuel selector. Ordered the FS2020 duplex selector with four 90 degree connectors on the sides of the adapter. The top two adapters point AFT, the bottom two point DOWN. Make sure to install with Locktight 648 per the tag on the box.

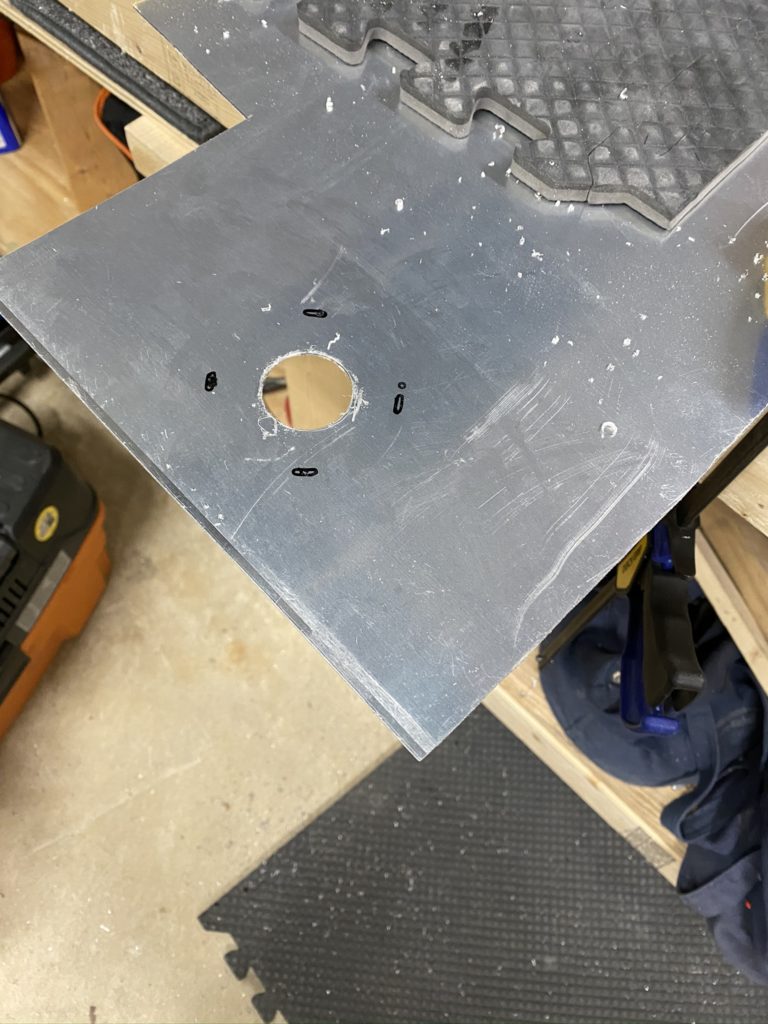
I also needed to fabricate a mounting plate for the selector as it doesn’t fit with the VANS supplied kit. Using some spare aluminum sheet, I fabricated a new mounting bracket for the fuel selector and used the edges of the original bracket to mount to the tunnel.

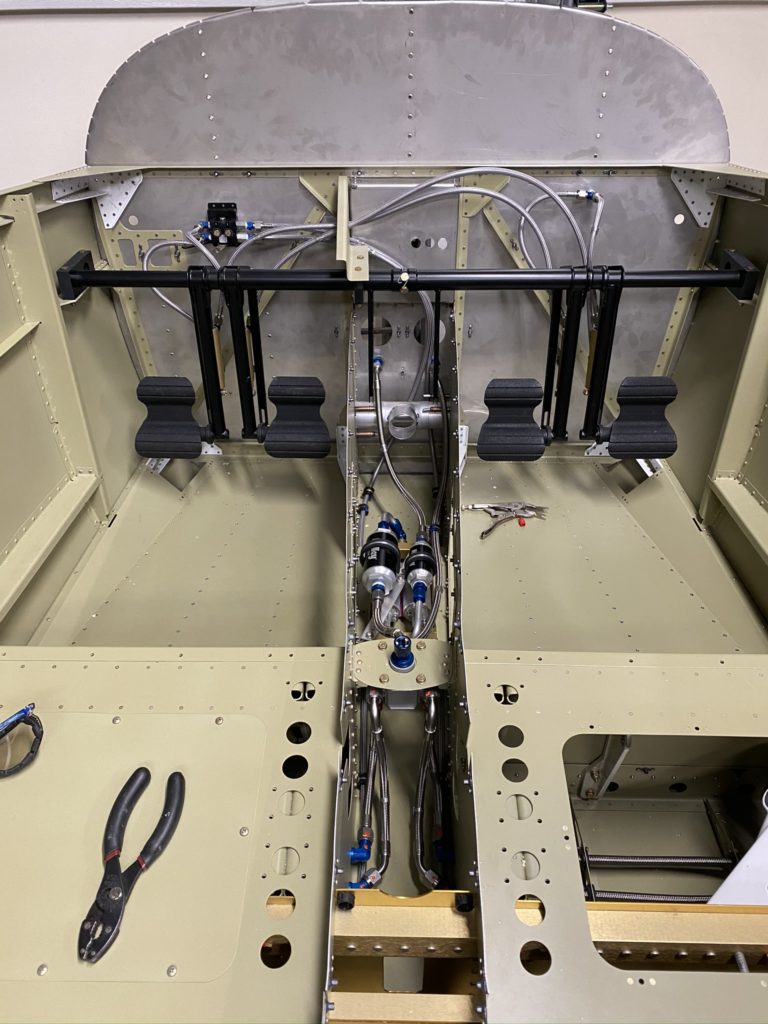
With the fuel pump and fuel selector installed, it’s time to install hoses. Order of install is kinda a real thing as space is tight and sometimes you can’t get a wrench on a fitting with another hose installed. Sorry, didn’t write down my magic ordering – if you are following my lead you can experience this for yourself 🙂

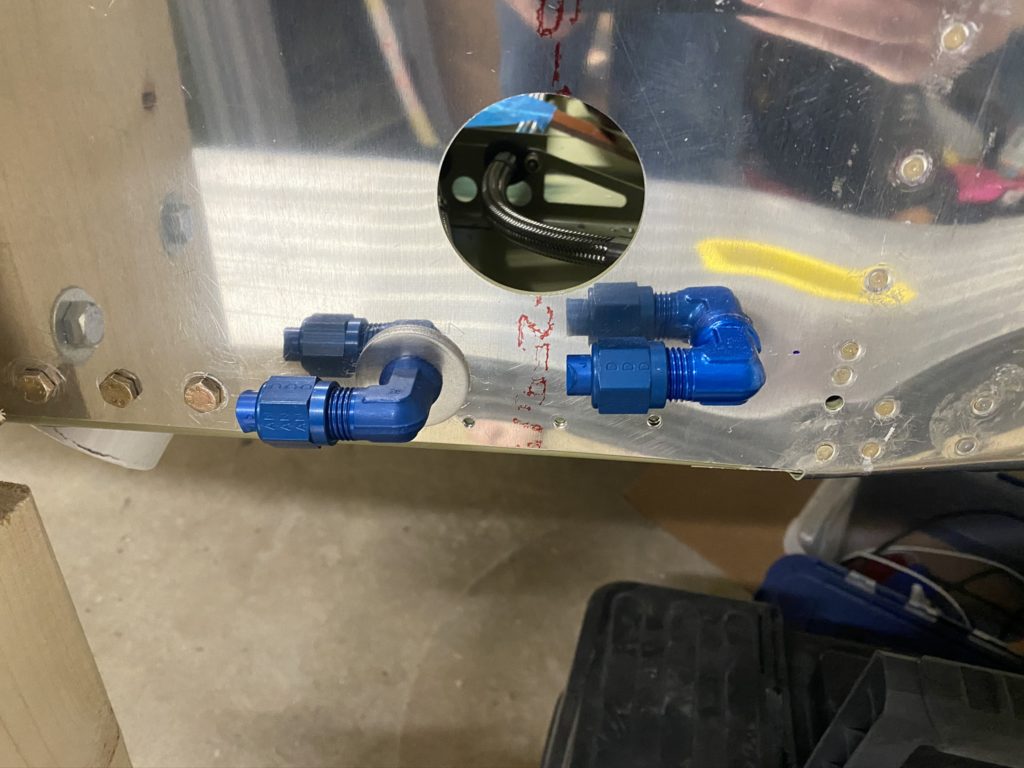
I also had create a few new holes in the fuselage. One in each wing-root for the fuel return line, and one on the firewall for the fuel supply line. I used the measurements in the System32 guide, should work just fine. I also used the TCS 90 degree fuel bushings for the wing root penetration.

Left- original Vans hole using the TCW bushing. Right new hole with standard 90 degree bulkhead fitting

I provided my info to Steve so he could post a more complete installation document on his site. End result is that I REALLY like how everything has come together and how things look.

Brake lines were also pretty straight forward. The kits sent by Steve were pretty easy to install. I elected to get the fittings and the hose, so I had everything I needed. It’s pretty obvious where each of the hoses goes once you get into it. For now I just put caps on all of the hose ends and bulkhead fitting to keep everything free of dust / dirt. It will be a while before I’m ready to put fluid into the system.

All cabin hoses installed

Tailcone Attachment

*Pre-COVID-19:

After getting one of my buddies over, I was able to do the initial attach of the tail to the fuselage. Initially we attempted to install the tail with the F-1074 Tail top skin and the F-1006 (A and C) ribs installed. This honestly just made things more difficult. Once we removed those pieces, and used my HF hydraulic table, things went much better!

With everything clecoed together, I then began to match drill the longerons, followed by match drilling the remaining holes in the skins to the underlying structure (I’m oversimplifying what is in the drawings). Don’t forget to fabricate the shims, then countersink everything called out in the plans.

Once everything was drilled, pull it apart, debur, dimple (as necessary), and re-assemble. Again, I found I could re-install the tailcone on the fuse by myself with some critically placed saw horses, my hydraulic table and the F-1006A/C rib removed. Once the tail was attached with a few clecos and bolts, I could insert the F-1006 rib without too much trouble. This did require an offset rivet set to allow me to get the F-1006B rib riveted in.

With the tail attached (and mostly riveted together – need to get a helper so I can get the bottom skins riveted), I decided to build an updated fuselage stand so I could access the bottom of the airplane. This is necessary for me to begin the Air Conditioner scoop install. Basically some 4×6 lumber, some longer bolts and some casters. This setup does still require a sawhorse under the tail for now.

Rudder Pedals

I was getting a little frustrated with the overall progress of the build and wanted to do something to help with my motivation. I decided that installing the rudder pedals (Control Approach upgrade) would both make me happy and was something that wouldn’t have an impact on the build process.

The rudder pedals are in my opinion a huge upgrade both visually and functionally. Dealing with Paul was very pleasant as I was not in any rush when I ordered them. I honestly was the biggest holdup as I didn’t have my master cylinders before he was ready to ship, so he ended up sending me the pedals with a set of his master cylinders and I just shipped him the ones I got from Vans in my Fuse kit when it finally arrived. Nothing but great things to say about Paul.

Setup of the pedals was SUPER easy. There are no instructions that come with them, but it’s pretty easy to figure out on your own. Connect the two sets of pedals in the center and screw in the four bolts. Only new skill I had to figure out was how to do the safety wire on the bolts. Quick refresher from YouTube and I was good to go. (Think they turned out pretty well).

The only thing that I don’t like about them at the moment is they are not compatible with the aerosport rudder trim system. Paul has said he is working on something, so fingers crossed that may become a thing.

Fuselage Side Skins – Part 3

While the wings seemed to just take forever, the side skins of the fuse made me question my life choices. This chapter just took forever for me to complete. Between family, work, and the desire to keep my sanity I found that I was just dragging my feet on this chapter for many reasons.

Looking back, most of my delays were trying to find time to get someone to help me rivet in areas where I just couldn’t do it myself. As I have said before, I don’t have many friends that are into aviation and those that are really don’t want to help me rivet unless I desperate. (I think they are scared that if they do it wrong my airplane will fall out of the sky one day! LOL. ) My other default choice is my wife, however she also has her limits on what she is willing and capable of doing.

With the challenges to get helpers scheduled, I ended up jumping around quite a bit. I’ll post updates on those shortly, however the main point of this update is to celebrate that I completed Chapter 29. The takeaway is, keep working at it. While it seems to take forever, there is light at the end of the tunnel.

One thing I’m going to start doing is posting more details about upgrades and mods. I have been spending a lot of time looking ahead in the project and trying to make some decisions. Hopefully I’m not getting too far ahead of myself, but thinking ahead will help prevent some pain later on. As I mentioned in my New Years post, I did order the Finishing kit, as well as a smattering of other items. Hopefully I’ll start getting some of those goodies in the near future.

The timelapse for the end of this chapter isn’t complete as I just didn’t have it in me to video everything. But it does show I was doing most of the work myself. 🙂