Bottom Wing Skin – Part 5

With the gap fairing installed, and thoughts that maybe I should just install the bottom skin on the wings, I decided to stop avoiding it and get moving.

First thing I needed to do was read up on where I wanted to mount the Pitot tube mast on the wing. Saw lots of folks talking about mounting it almost at the wingtip, but honestly decided I was going to mount mine in the location outlined in the RV-10 plans.

At this point, I’m already thinking I’m going with the G3X system (or at least the Garmin ecosystem) in my airplane, so I went ahead and purchased the GAP-26 heated and regulated pitot tube as well as the pitot mast. I also purchased the Gretz pitot mast kit from Aircraft Spruce so I could get that installed as well.

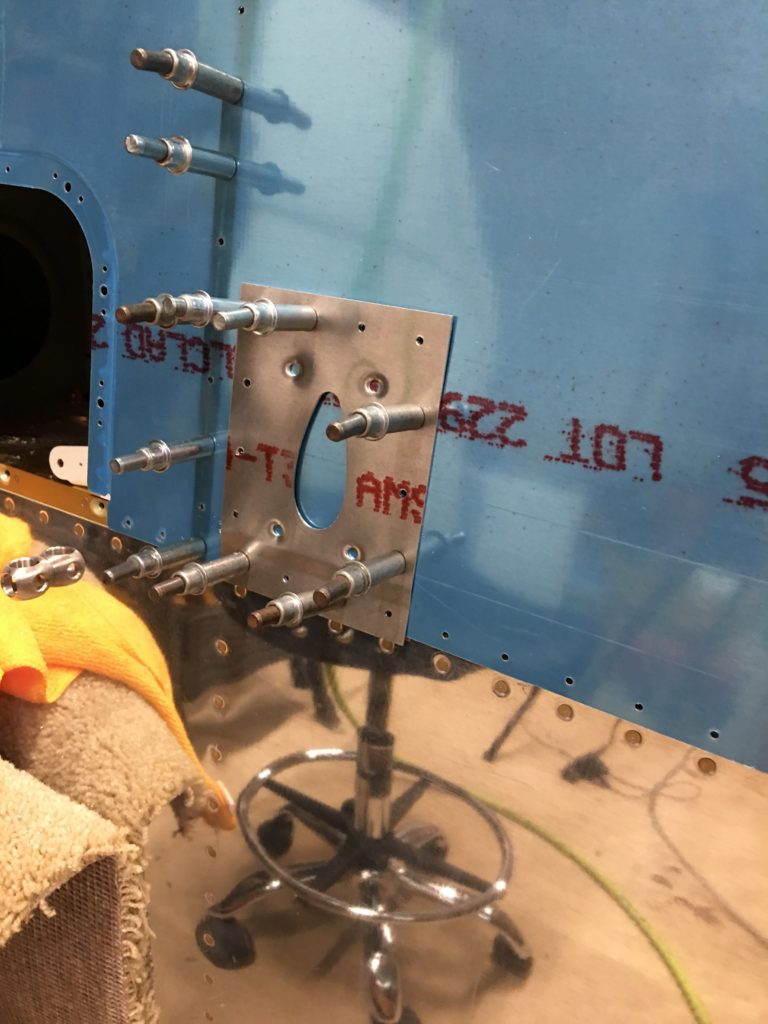
Reading up on the plans, it didn’t seem like this was all that difficult, but it is a bit nerve racking making that first cut into the bottom skin. Following the directions for the Gretz mount I first line up the backplate and match drill the holes on the flange using the spar as a guide. Next, I drill the holes in the backplate per the instructions making sure they are evenly spaced. The directions then say to drill the holes from the inside of the wing into the skin using the backplate as a guide. I can’t contort or get my drill in that confined space. Instead, I just put the skin on the wing, and cleco the back plate on the outside of the skin and match drilled the holes that way. (see photo). I also marked the hole locations for the pitot mast and the screw holes so I could drill those out with the backplate removed.

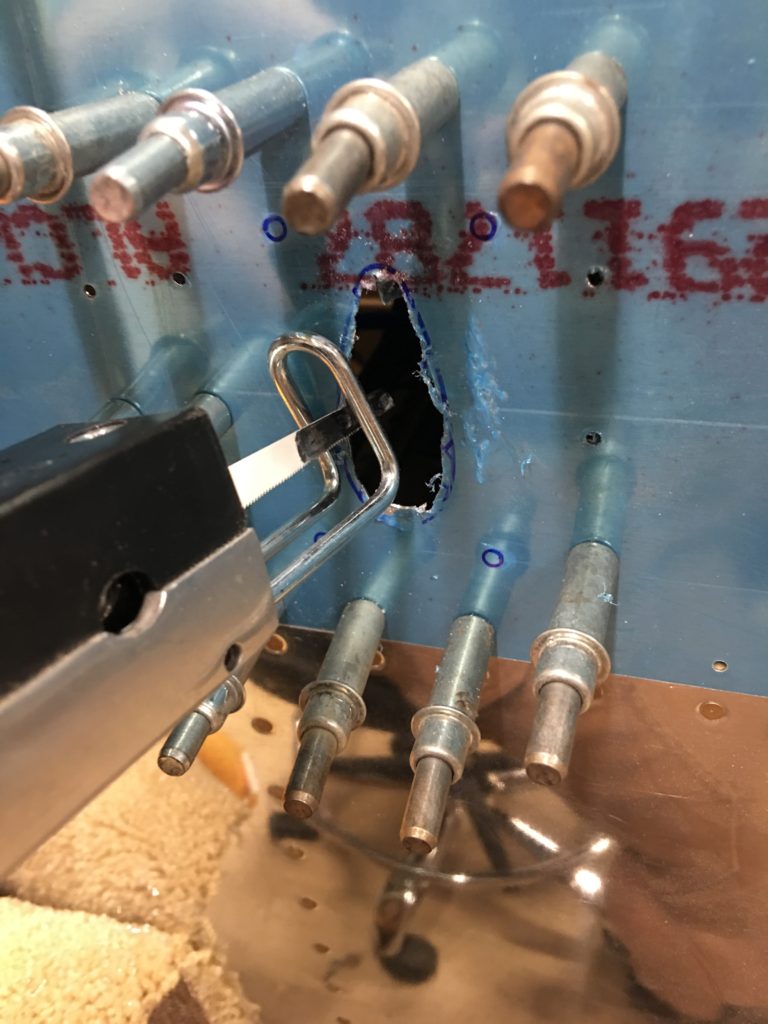
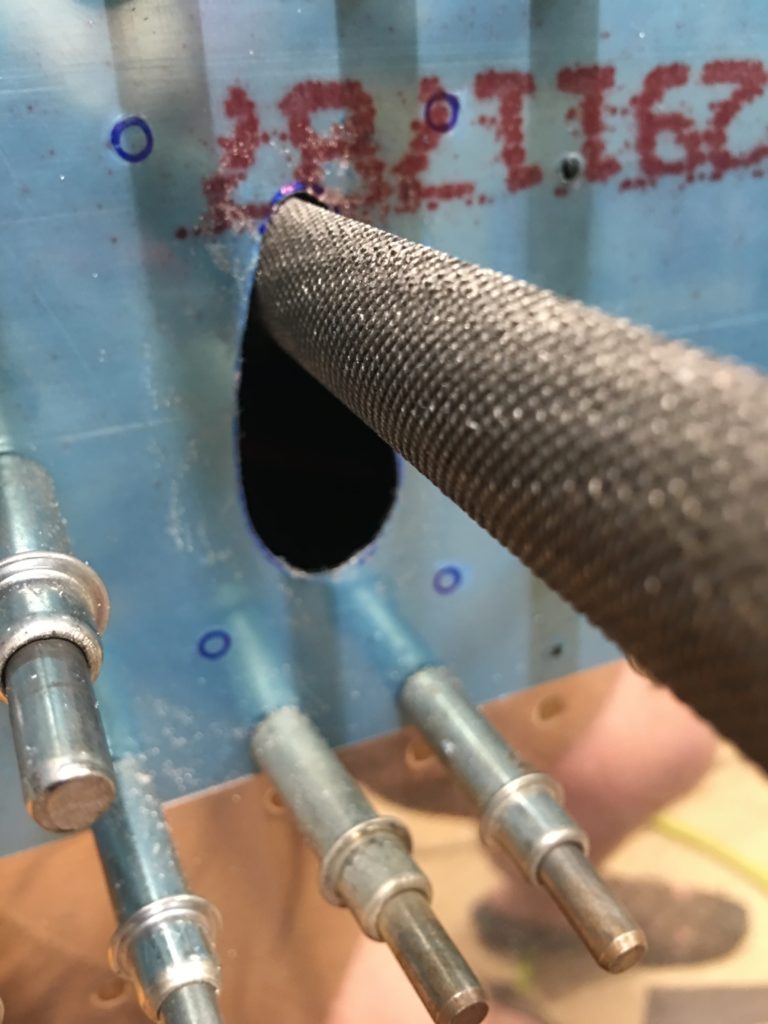
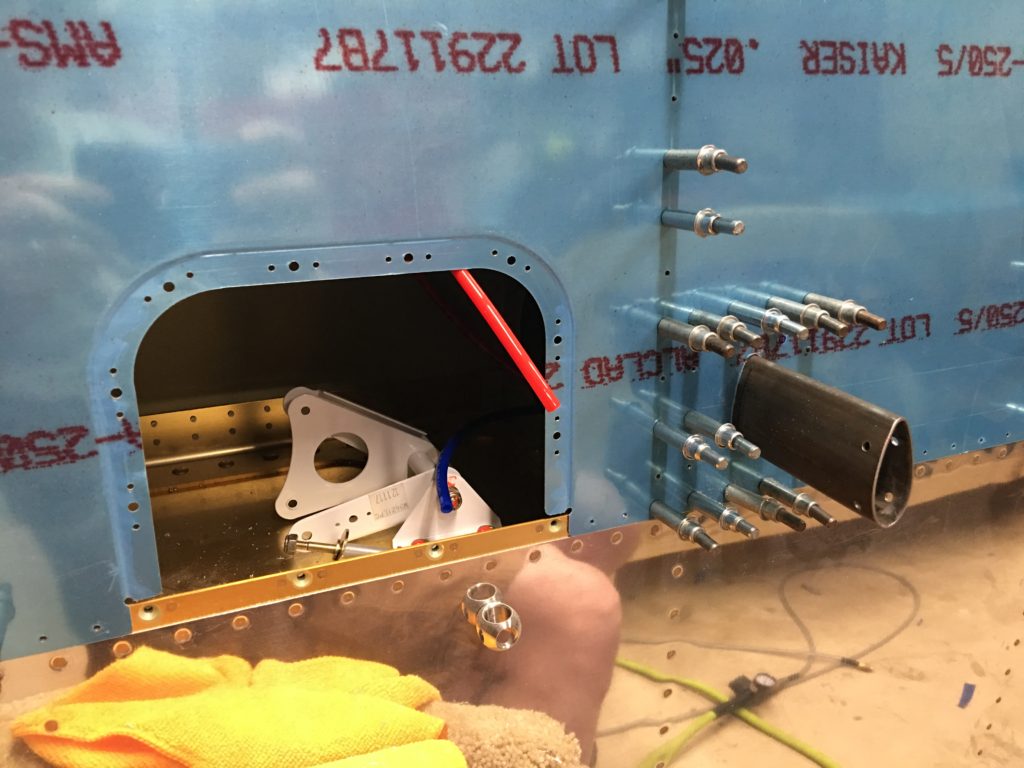
Using my harbor freight air-saw, I then rough cut the opening for the pitot mast. I then clecoed the backplate on the inside of the wing, then started to slowly file the opening back to match the backplate using a combination of files, die grinder, sandpaper, and finally scotchbright. Then I just needed to drill the screw holes into the skin.

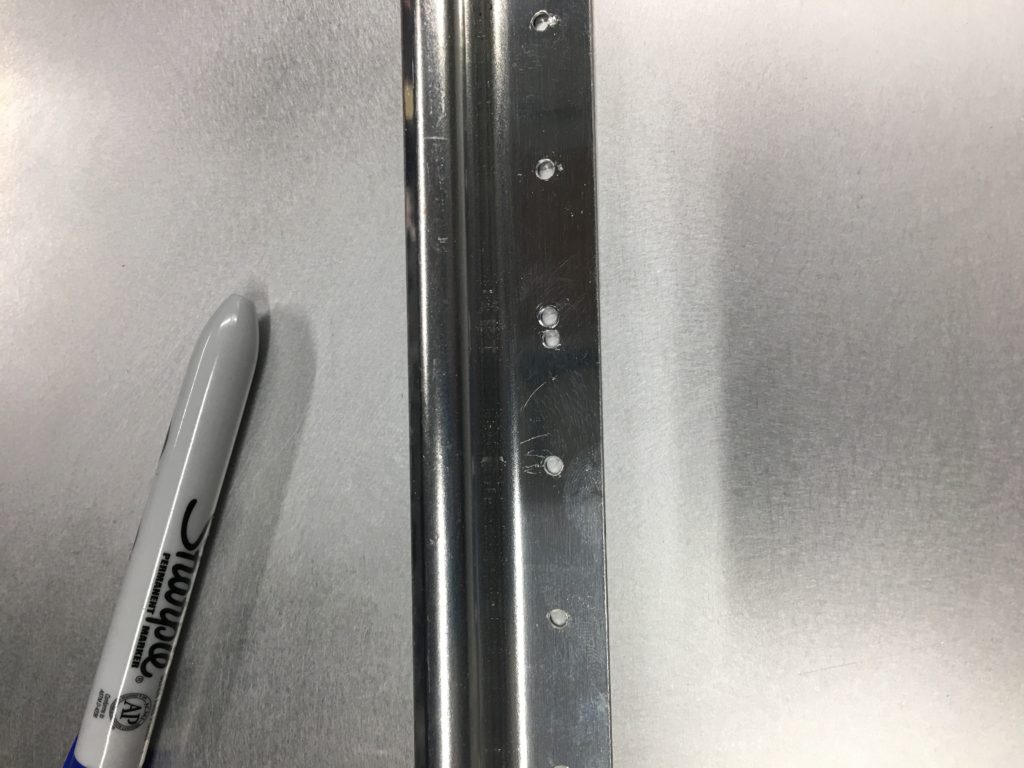
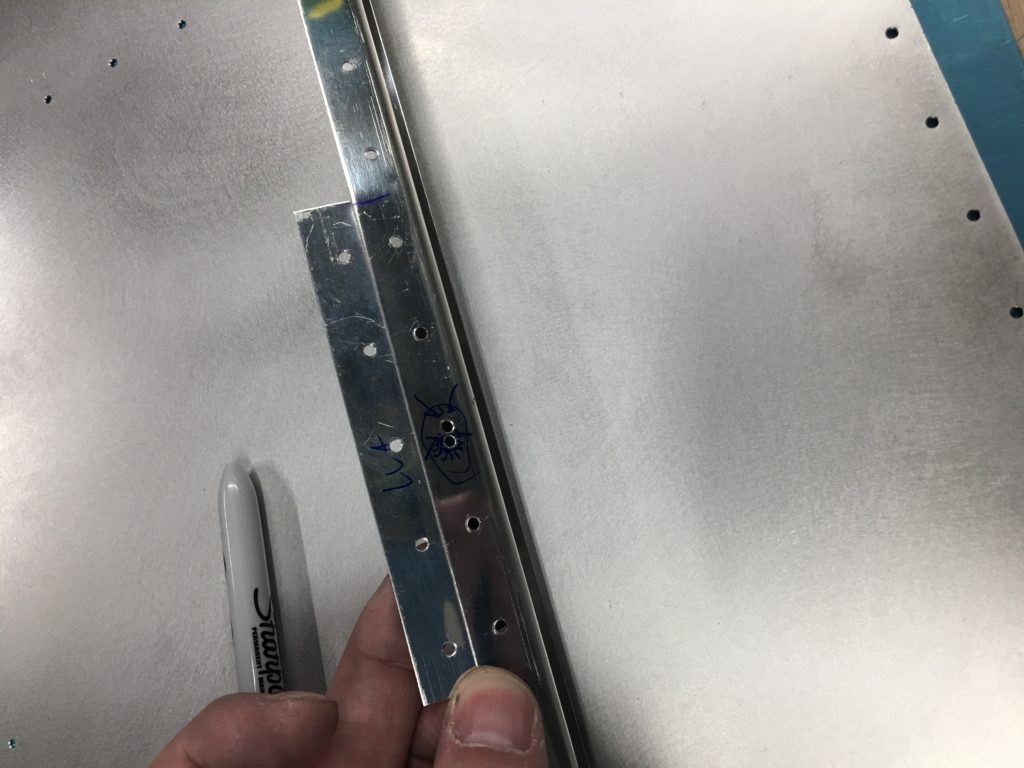
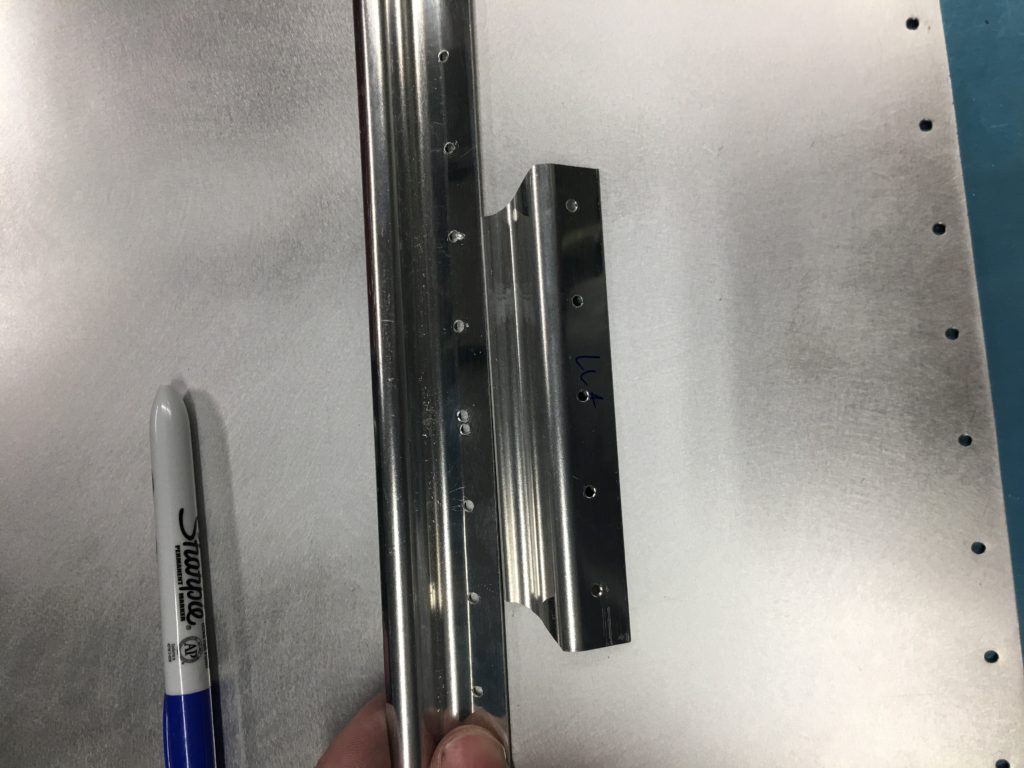
Upon starting to prep the skins for priming, I realized I had a small “oops” with my J-channel. When match drilling it looks like I ended up drilling two holes right next to each other. To repair this, I decided to fabricate a doubler that I will install as I complete the bottom skin. Attaching photos below of my “fix”

Then its on to sanding the scarf joint, priming the skins and J-channel, and getting everything appropriately dimpled. Sorry, no timelapse of this work, but it’s not really any different than what I did for the top skin. With everything primed for the left wing, I just install the skin and cleco into place for now. All advice I got was that a second set of hands is really needed. That means I may just kick the bottom skins down the road a bit, possibly till I move the project to the airport?

Bottom Wing Skin – Part 4

Ok, so I’m totally jumping around in the build as I circle back to things I skipped due to weather and mental fatigue. Regardless, please forgive the fairly random order as I try to finish up the last few items before I focus on the fuselage.

With both ailerons completed, and one flap done, I needed to go back and install the gap fairings. This is a very straightforward install and the only newsworthy item to report is yet another new tool I ended up getting. Due to a post on VAF as well as a a sale on one of the major tool vendors, I ended up picking up a hydraulic-pneumatic squeezer by Numatx. This is a foot operated squeezer that uses hydraulic oil to actuate the squeezer. Benefits are the squeezer head is so much lighter and smaller, and you don’t have to adjust the RAM for each rivet length.

In practice, I find I do spend more time than I expected adjusting the ram / squeezer dies on the Numatx , however I really do like the operation of the unit.

Back to the gap fairings, I primed them and dimpled the #40 holes. I then dimpled the top wing skins using the Numatx squeezer. Next I install the gap fairing, and using the Numatx squeezer start to install the rivets in the skins. Next I cleco the gap fairing to the spar and change the dies and air pressure into the Numatx squeezer so I can set the AN470 3-x rivets. All goes together very quickly. Off camera I also finish up the other GAP fairings for the flaps and aileron on the other wing.

Aileron – Part 5

With all the components of the left aileron now primed, I can begin the final assembly and prep work. First step is to dimple the ribs, and the part of the skins where the ribs attach. Next I back rivet the ribs to the skins.

Once the skins are prepped, I can cleco the entire aileron together again to fit the trailing edge and get it drilled. I’m also checking to make sure there is no twist or weird waves in the aileron at this stage with a straight edge.

Once the trailing edge has been drilled, I once again disassemble everything. I also double countersink the trailing edge as the final prep step for the ailerons. Then it’s time to begin final assembly.

First step is installing the components into the nose skin. Ribs and counterbalance assembly is installed and riveted into place in the nose skin. Next I install the spar and rivet that to the nose ribs using blind rivets. If I didn’t mention it already, I really like that pneumatic blind rivet puller. So much better than the manual one.

With the nose assembled, I then install the top skin between the nose skin and the spar. For some reason I felt that my bench and the aileron were sitting just a little high for me to reach over the skin to rivet, so I decided to put the work on the floor and bend over it to rivet. Seemed like a good idea, but later my back told me that I was being dumb. Regardless, it worked and I was quickly able to get the top skin riveted into place.

Next up is installing the bottom skin. Same deal as the top skin, but you have to stick your hand between the skins to hold the bucking bar. It’s been a number of years since I have been described as “skinny” or “small” so I’m amazed that I could get my hands in there to correctly hold the bucking bar. (I did have to remove my watch and ring). I’m not going to suggest that every rivet was perfect, but they were within spec.

I then installed the trailing edge and checked that everything looked nice ans straight. Next was to install the blind rivets in the nose into the counterbalance. and to set the rivets between the hinge bracket and spar. These AN470 rivets were a pain and I ended up with a smiley or two. As much as I would love to replace those rivets and do a better job, my fear is trying to remove those rivets in that cramped space would end up doing more damage than good, so they will stay smiley and all.

Last step is to install the trailing edge. I decided to use the VHB tape as well as the cleaveland trailing edge squeezer tool. I clean all the surfaces with acetone, then install the VHB tape on both sides of the trailing edge. I then install the TE and cleco everything together and press the edges together so the VHB tape will help hold.

Next I use the squeezer tool to start setting the TE rivets using the special dies. Pretty easy and looks decent enough. I have a feeling that back riveting will net a better result, but it is what it is. Once the TE is all riveted, I install the last few blind rivets on the edges of the ailerons. With that the aileron is completed and ready to install on the wing.

Ailerons – Part 4

Continuing to assemble the right aileron, I start to rivet the hinge brackets together as I work on the top skin. I then continue to rivet all the ribs and the inboard and outboard brackets to the top skins per the plans.

I then disassemble the counterbalance and begin to attach the counterbalance to the ribs. While not mentioned in the plans, this is SO MUCH EASIER if you just remove the nose ribs from the spar before you begin to attach the counterbalance. This allows much better access with a screwdriver and small wrench.

Next I reassemble the nose section so I can pilot the nose skin to counter balance holes, then up-drill them to #30 to accept the blind rivets. Honestly I feel like I assemble, disassemble way too many times in this project.

Also I realized I dimpled the aileron skins before I should have. Only where the ribs are back-riveted should the skins have been dimpled. Spar and trailing edge should not be dimpled yet. (I’ll remember for the left aileron). Plans are accurate, but sometimes making sure you understand what they are saying can be a challenge. Either way, no big deal and totally was able to work past this bump.

I then completely re-assemble everything to drill the Trailing edge (checking to make sure the aileron is not twisted). Then take it all apart for hopefully the last time. I also left in some footage of me drilling the trailing edge with my drill jig. Easy to do with the drill press and a microstop cage.

I also decide to make cradles for the ailerons to help with assembly. You need to make them for the flaps anyway, so I guess making them early isn’t a bad thing.

With everything finally primed, I am able to start final assembly. I know it was in the flaps update, but I was jumping between flaps and ailerons for the last month. In this timelapse, I open and get to use the blind rivet puller for the first time. I think this was from Aircraft-tool? Not terribly expensive (not rated for cherry max rivets), but seems to work quite well. Highly recommend that you get one from any of the vendors.

The remainder of the assembly is straight forward. Only comment is trying to rivet between the hinge brackets is a pain in the rump. Got it all riveted together, but not getting any awards on those rivets. I did sand down one of my rivet sets a bit to allow it to physically fit in that tight space. Not sure how others did it as it’s really tight.

End of the assembly got lost to the camera gods. I am setting up to back-rivet the TE for the ailerons but guess the gopro lost power.

Flaps – Part 2

With the parts dimpled, and the sub-components riveted together, it was time to begin final assembly of the flap itself. I had read ahead on the plans and realized I needed some new drill bits for the blind rivets. I ordered a #33 jobber bit but didn’t realize I needed a long bit to clear the hinge plates on the nose ribs. Another order submitted for a 6″ bit. While I was at it, I also decided to purchase a close quarters rivet pulling wedge vs fabricating one.

I did have a “manual to implementation” issue with the flaps (Things got lost in translation in my grey matter). I misread / misunderstood the order of operation and ended up blind riveting the bottom skin to the ribs BEFORE I installed the trailing edge. While not the end of the world, it did make the installation of the wedge a bit more difficult than it needed to be. (The flap looks straight so far, but will check and verify against the other flap to make sure.) Worst case is I build a new flap at some point. (wont be the first thing I have to re-order!)

I also had a new tool that I decided to try out – a Trailing Edge squeezer set from cleaveland tool. Instead of setting the double flush rivets with a backrivet plate and a flush set in the rivet gun, you use these angled rivet sets in your squeezer that are aligned with a large safety pin? It’s hard to describe, but it seems to work. Between this new tool and my out-of-order assembly I’m waiting to decide if my flap trailing edge is really as straight as it should be. (I’ll also have some EAA chapter friends give me some feedback).

With everything done, I then press-fit the bushings in the wing side flap brackets (don’t do this unless you are done with the bottom skin), and install the flaps. All look good and I’m excited for another component to be completed. At this point I just want to mark the wings as done (or done for now). Still need to complete the other Flap, finish sealing the tanks, and make a decision on the bottom skins.