Flaps – Part 1

I decided to put the fuselage work off to the side as the next steps will start to take up significant space in my garage. Instead, I am focusing on finishing up the last few items on the Wings as I will need some significant workbench space to complete them.

Before I jump to the flaps, I decided to drill the aileron torque tube endcaps just to knock them off my list. Next on my hit-list are the flaps. I went ahead and began by sorting and marking all of the ribs and components for both sets of Ribs. I then deburred and modified the components based on the plans in the manual.

With everything sorted, I then began to create the different assemblies for both right and left flaps, drilling and deburring as necessary. Once all the sub-components were ready, I then focused on building out one flap at a time due to space constraints.

Assembling and final drilling the flaps was pretty straight-forward with no real surprises. The only gotcha I ran into was I did not own a uni-bit that could drill a 1″ hole to reduce the weight of the FL-1008 Spacer (Page 22-3 Step 3). A quick search of Amazon got one shipped in a few days.

With all the components prepped, I marked the locations of all the parts, then disassembled to prepare for primer. I ended up doing 3 different primer sessions as tried to work around my family schedule, weather, and sanity. Ended up forgetting the spar, only to have to do that by itself, then realized that I only sprayed one of the nose skins. More head slapping than anything else.

With the parts primed, I being to dimple and assemble the components. I start with the hinge brackets and rib assemblies. Then I move on to skins and spar. I had not deburred the side of the skin that wasn’t primed, or some of the edge, so that needed a little attention. Other than that the instructions are straightforward if not time consuming.
Ailerons – Part 3

Had another marginal weather day that allowed me to prime a handful of parts. With the Fuselage delivery date just a few days away, I stole a little time in the garage after work to get just a little more progress.

I rivet the hinge bracket to the rib and begin to dimple the skins. With that completed, I being to lay out the stiffeners and start to back rivet everything in place. Before I start to rivet the top skin, I go to attach the bottom skin to the spar and realize that this skin is really the right aileron vs the left.

Totally my fault as I was having difficulty “seeing” everything as it went together. Possibly because I had the fuselage on my brain, but with the parts in front of me starting to go together things are making a lot more sense. (When unsure stop and figure it out!)

No big deal, but it also showed that I counter sunk the wrong side of the right hings brackets. Quick call for replacement parts and I’m in another holding pattern. Luckily nothing incorrect was riveted together so I’m still in good shape.

Aileron Actuation – Part 2

Jumping around again, I’m back to the Aileron Actuation chapter. I decided I needed to start preparing the torque tubes as well the pushrods. After pulling down the aluminum tube for the torque tubes, I measure how long they need to be and trim them off on my bandsaw in an attempt to keep the ends square. Once done I give both ends a quick deburr and set them aside.

Next I mark and measure the pushrods and figure out how best to cut them to size. Too long for the throat on my bandsaw, so maybe I can use my hacksaw? Kinda works, but the blade keeps wanting to jump, so I end up grabbing my Dremell and a cutoff wheel. Some sparks followed by a quick touch up on my belt sander they are the correct length.

Next I need to sand down the rod ends and the inside of the pushrod so everything will fit together. (You will need to prime the parts, so slightly OVER SAND to account for the thickness of the primer.) Manually sanding the inside of the small pushrod sucks, and don’t have a great solution for this yet. Sanding the outside of the pushrod ends is easier. Chuck it in the drill and hold some sandpaper against while you pull the drill trigger. Works well!

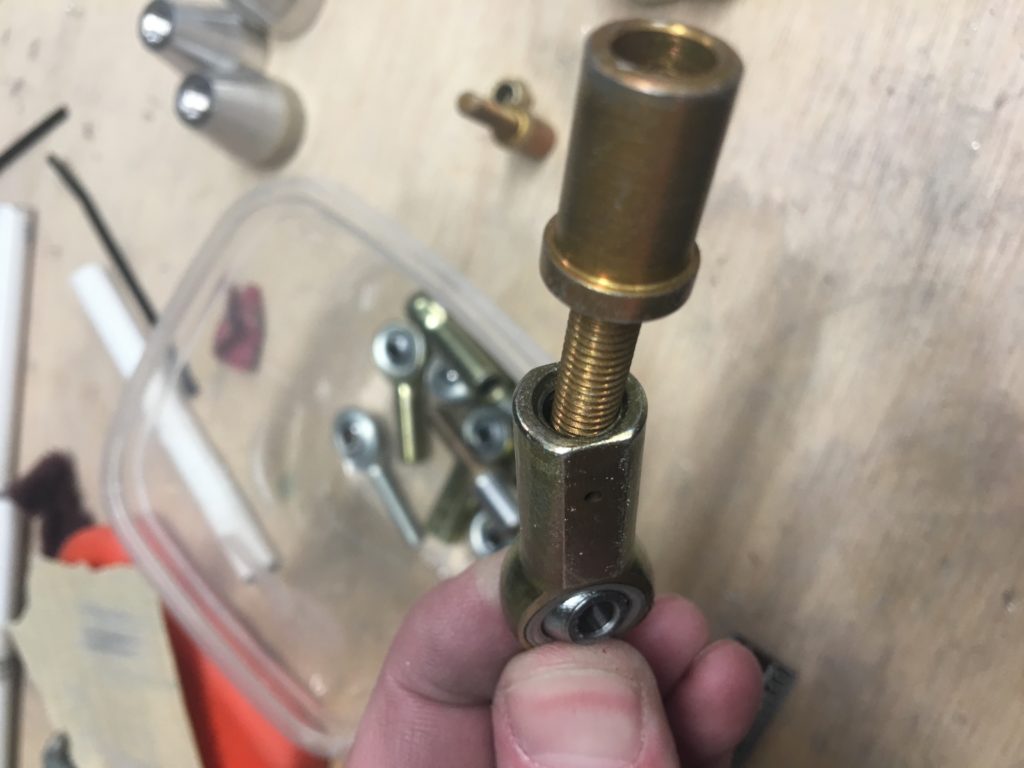
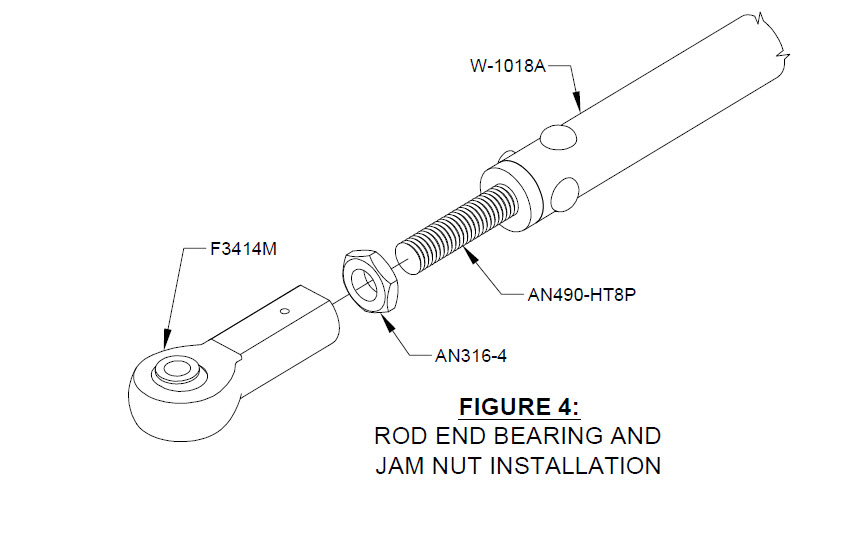
I then looked for the additional hardware to attach to the rod ends and was puzzled that the screws would not thread on the female bearings. Had to double check the packing list and directions a few times before I sent off a note to Vans. (see photo below). One thing Vans isn’t great about is communication. After waiting a week for a reply I finally called to find out that they had a bad batch from their supplier and the Parts department would be sending me a new set. A few days later, I got an e-mail that new bearings were headed my way and I needed to send the wrong parts back to them. Not a huge deal but a quick e-mail back to me saying “yep, you have the wrong part from us. We’ll fix it in the next week or so” would have reduced my stress!

Anyway, I move forward to drill the holes to attach the rod ends known those are the correct parts now. Mark holes with center punch, drill pilot holes by hand. Use Drill press with centering block to drill through the pushrod.

Here is where I kinda messed up. when you go to drill the pushrod ends, do this by hand / don’t try to drill all the way through both ends on a drill press. I ended up making a few of the holes look like an 8 and overall just think I can do better. For now I’m building on, but most likely will purchase a new pushrod and pushrod ends before first flight. Maybe add them to my finishing kit?

All for now until I can prime these parts.

Ailerons – Part 2

The stars aligned. Between the weather and my schedule I was finally able to get a few parts primed the other day.

With that said, I jumped back to working on my ailerons. I being to assemble the Inboard and Outboard hinge brackets and realize I need to find the MS21055-L3 nutplate. This is a corner nut-plate and you only have 2 of them. Did I ever mention you need to have your parts organized? Honestly I thought I did a good job of this, but still took me way longer than it should have to find these nutplates.

Once located, I rivet the hings brackets together and then can try to final drill the counterbalance. The drawings mention that you may have to use a screwdriver bit using a pair of pliers. I actually try to do this only to get frustrated. Finally have a lightbulb moment and realize I can just uncleco the hinge brackets from the spar to tighten these screws. SO much easier!.

Flip that aileron over, install the nose skin, and match drill the holes into the counterbalance. I then go to the other Aileron where I hadn’t drilled any holes in the counterbalance yet, and I begin to get that counterbalance drilled and marked for where it attaches to the hinge brackets. Ran out of “free time” and had to put it away.

Aileron Actuation – Part 1

Skipping around to section 23 – Aileron Actuation. I’m really starting to dig deep to find things to work on until I am able to prime parts. After clearing a section of my workbench, I being to work on the Aileron Actuation section. I skipped past the torque tube parts and push rods and look at Page 23-5.

I’m starting to sand and fit the pushrod ends into the WD-1014 assemblies. As these parts are powder coated, some of that coating needs to be sanded out of the inside of the part so the rod-ends will fit in.

Once sanded, you need to install the rod ends on the “short” side of two of the WD-1014 assemblies (AFT) and two on the “long” side of the other two assemblies (FWD). Match drill, (mark alignment), deburr and blind-rivet them together.

Next you then install the WD-1014C steel tubes into the FWD assemblies and drill holes for AN3 boltes. This is where I got ahead of myself and made a mistake. I ended up drilling one tube into the FWD assembly, and the other into the AFT assembly. I realize as soon as I finish drilling the holes. Oh well. This is not the end of the world and low on my mistake list.

I just need to mark everything so when I do go to drill the other side, I remember how everything aligns and I don’t drill the AFT to the other AFT piece. Oh well. Short video to show mistakes happen and you can recover from them.